
Introduction
Axepta allows you to use different payment methods. Each of them offers different possibilities, through an e-commerce platform, such as:
- Regular payment
- One click payment
- Recurring payment.
Prerequisites
Required PHP version of the server should be minimum 7.1
Installation of the plugin
To install the plugin, you need to follow these steps:
- Download the zip file and extract it.
- Go to the root file.
- Create the following new folders:
app/code/Quadra
app/code/Quadra/Axepta
- Copy all the content of the extracted file in the folder:“app/code/Quadra/Axepta”
- Go back to the root file and launch the following commands:
php bin/magento setup:upgrade
php bin/magento cache:clean
php bin/magento cache:flush
Global configuration
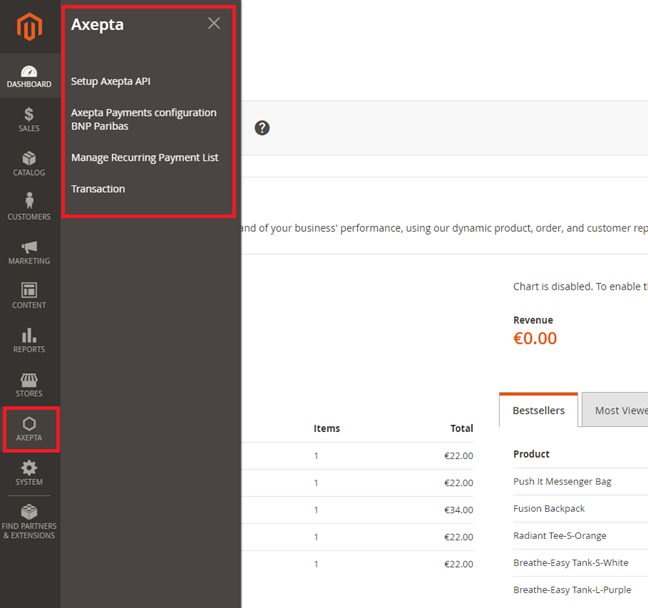
The different functionnalities are displayed on the left side of the Magento back office :
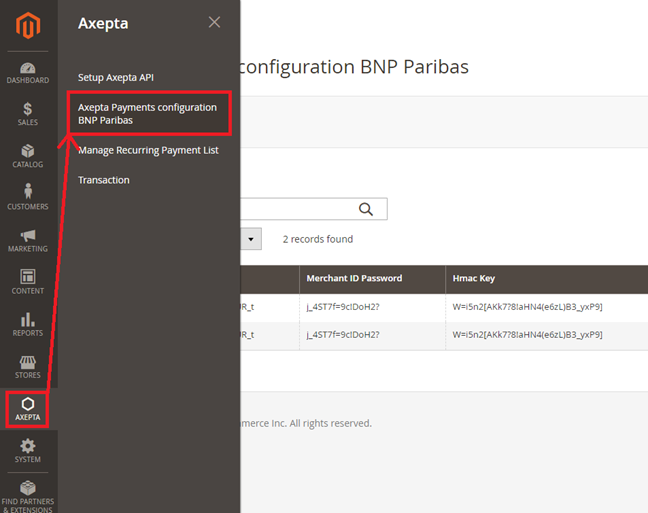
Adding an account :
To create the configuration of a new account, click on the link“Axepta Payments configuration BNP Paribas” on the menu :

Then, click on the button “Add new Merchant Account”:

Fulfill the following fields of the form:
1 - MID (Merchant ID)
2 - Password
3 – Hmac key
4 – Activation key
5 – Authorized countries
6 - Enable / disable account
7 – Default shop

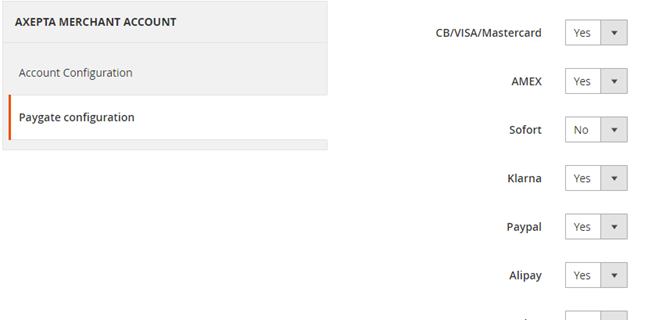
You can, now, choose the different payment methods you want to allow in your shop.
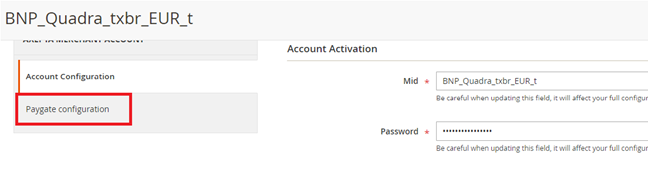
The tab“Paygate Configuration”will appear on the left side of the screen:
The payment methods which are displayed are the ones corresponding to your activation key.
Payment methods which are in grey are the ones not belonging to your offer, you can visualize your complete offer to see what does your e-commerce platform features.
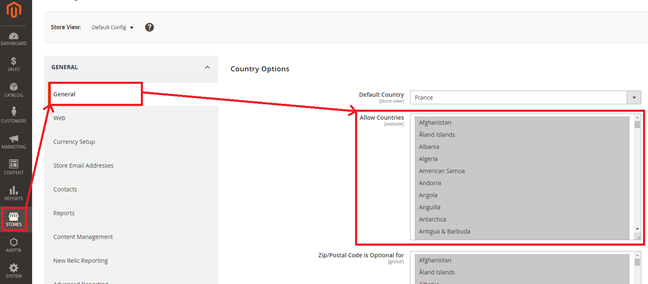
Some payment methods can be disabled when the country where they are authorized are not enabled in the backoffice. To enable one of many countries, you should click on the tab “Stores” > “Configuration” > “General” and activate the needed countries by selecting them.
You will have to use the Axepta menu to go back to the payment methods configurations.
You can now configure other account options:
Currency :
The currency is indicated by the activation key. This data can’t be modified. It appears only as an information for the account management.
You should enable the currency in advance in the backoffice. To do so, you need to go to the menu“Stores” > “Configuration” > “Currency Setup” and enable the currencies by selecting them.
Display mode :
Displaying the payment page can be done in two ways :
- Redirection => External redirection of the user towards the payment page.
- Iframe => Displaying the payment page on an iframe
3DSecure :
This option enables 3DSecure
One click payment:
This option enables one click payment via saving the payment method by the user in his account.
Subscription :
This option enables the subscription functionality
Capture method :
This option allows you to choose the capture method you prefer :
- Automatic => Capture at the end of the day
- Manual => After a defined time. If you choose this option you can also define the time limit before the capture (time limit in hours : number between 1 and 696)
Logs :
This option enables logs in order to share data with the support in case of issues.
Your account is now configured.
You can configure as many accounts as your contract allows you to.
To add another account, you need to go to“Configuration paiement Axepta”and do the exact same manipulations.
The list of accounts will be updated after every new entry.
Payment modes configuration
Regular payment
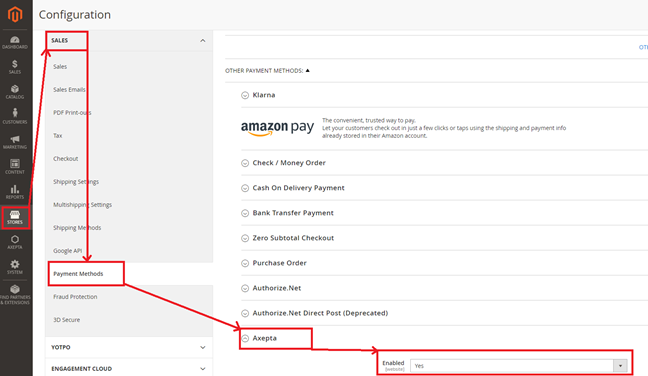
To enable different payment modes, go to“Stores > Configuration > Sales > Payment Methods > Axepta” and select“Yes”on the field“Enabled”
Oneclick payment
This functionnality allows your customers to save their payment method data so that they can pay faster the next time.
To enable this functionnality, you only need to check the box « Oneclick payment active »
The user will be able to manage his cards in his personal account via “My saved cards”
5.3 Subscription
5.3.1 Configuration
When the « Subscription » option is enabled, it’s possible to configure items which will be paid by subscription.
To do so, you will need to configure every item that accepts subscriptions:
Go to « Catalogue » > « Products » > Search by name of the item that you would like to configure as subscription by clicking on its name.
On the product sheet, you need to go to “Axepta recurring data options” and fulfill the different fields :
You can now configure the item :
1 : Type : indicates if the item will be paid by subscription or regular payment.
2 : Periodicity : indicated the type of subscription (monthly or daily)
3 : Interval occurrence : Number of times that the payment will be proceeded. If this value is not filled, the occurrence is unlimited.
4 : Recurring amount : Indicated the amount of the item in subscription, so this value can be different from the initial price of the item. This value represents the value that will be withdrawn in the future transactions.
5.3.2 Subscriptions management
You can preview all the subscriptions in the tab “Axepta >Manage Recurring Payment List »
You will find the following data:
- Subscription ID
- Order ID
- Client ID du client
- Product ID
- Associated transaction ID
- Subscription status
- Periodicity
- Date of the last payment proceeded
- Date of the next payment
- Subscription amount
- Colonne action
Plusieurs actions sont également possibles :
- Activer l’abonnement
- Désactiver l’abonnement (mettre en pause)
- Supprimer l’abonnement
Vous avez aussi la possibilité de modifier plusieurs abonnements en même temps en cliquant sur
“Actions groupées”