
...
From the merchant configuration menu, scroll down to the “Capture” field and select “Manual Capture”.
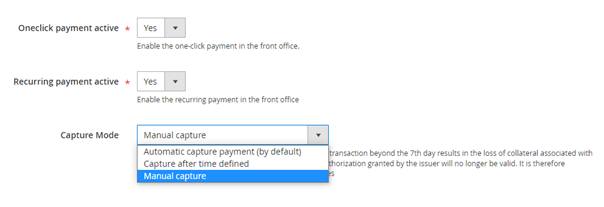
Attention : Without action of the merchant, the transaction will not be returned to the bank. Capturing a transaction beyond the 7th day results in loss of collateral associated with 3DSecure. After the 29th day the authorization granted by the issuer will no longer be valid. It is therefore preferable to capture operations before these deadlines.
...
Two columns have been added in the command table: one to know what type of capture was used for the command (automatic, manual or deferred), and another to know if the payment was captured from the Magento back office. A capture made on the Axepta back-office does not result in the update of this command panel but an alert is proposed in the event of an attempt on a transaction already captured (see alert notification).
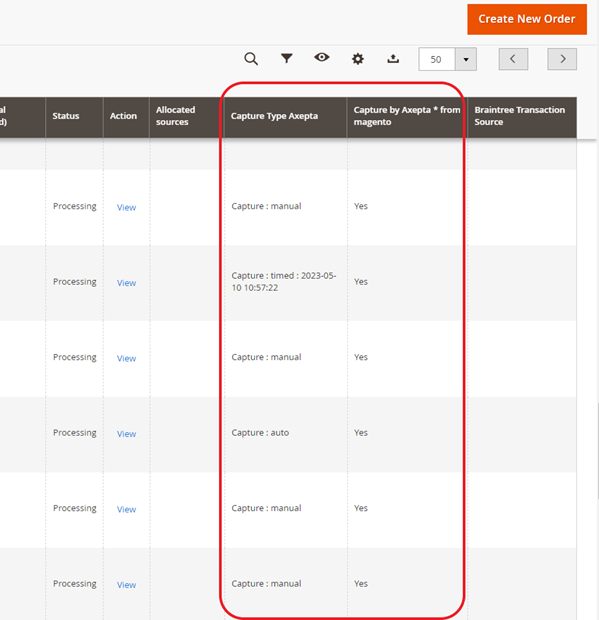
Deferred captures are marked “Capture: timed” followed by the date and time the capture was made.
...
To capture a payment manually, the order must be billed. Go to the page of an order to be billed and click on “Invoice”.

Then select “Capture online” to manually capture the order when the invoice is issued.
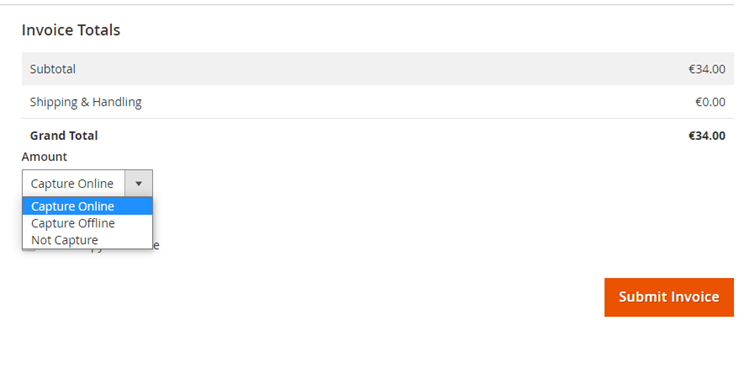
Capture online : The online capture from the Magento 2 back office will connect to the axepta back office. The status of the transaction is automatically synchronized between the two back offices.
...
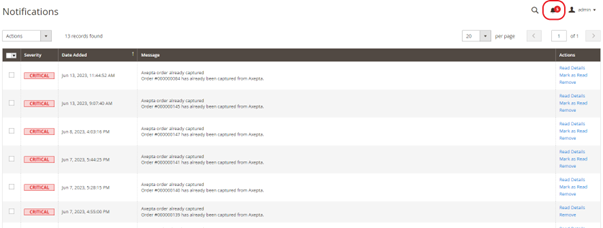
If attempting to bill an order where payment has already been captured, an alert message “Order has already been captured” will appear at the top of the page as follows :

Notifications have also been added when the capture has already been completed, as well as when a payment has not been captured for more than 7 days. The update is done once a day.
These notifications are visible by clicking on the icon at the top right of the screen :
Logs :
This option enables logs in order to share data with the support in case of issues.

Your account is now configured.
...
The render of the checkout page
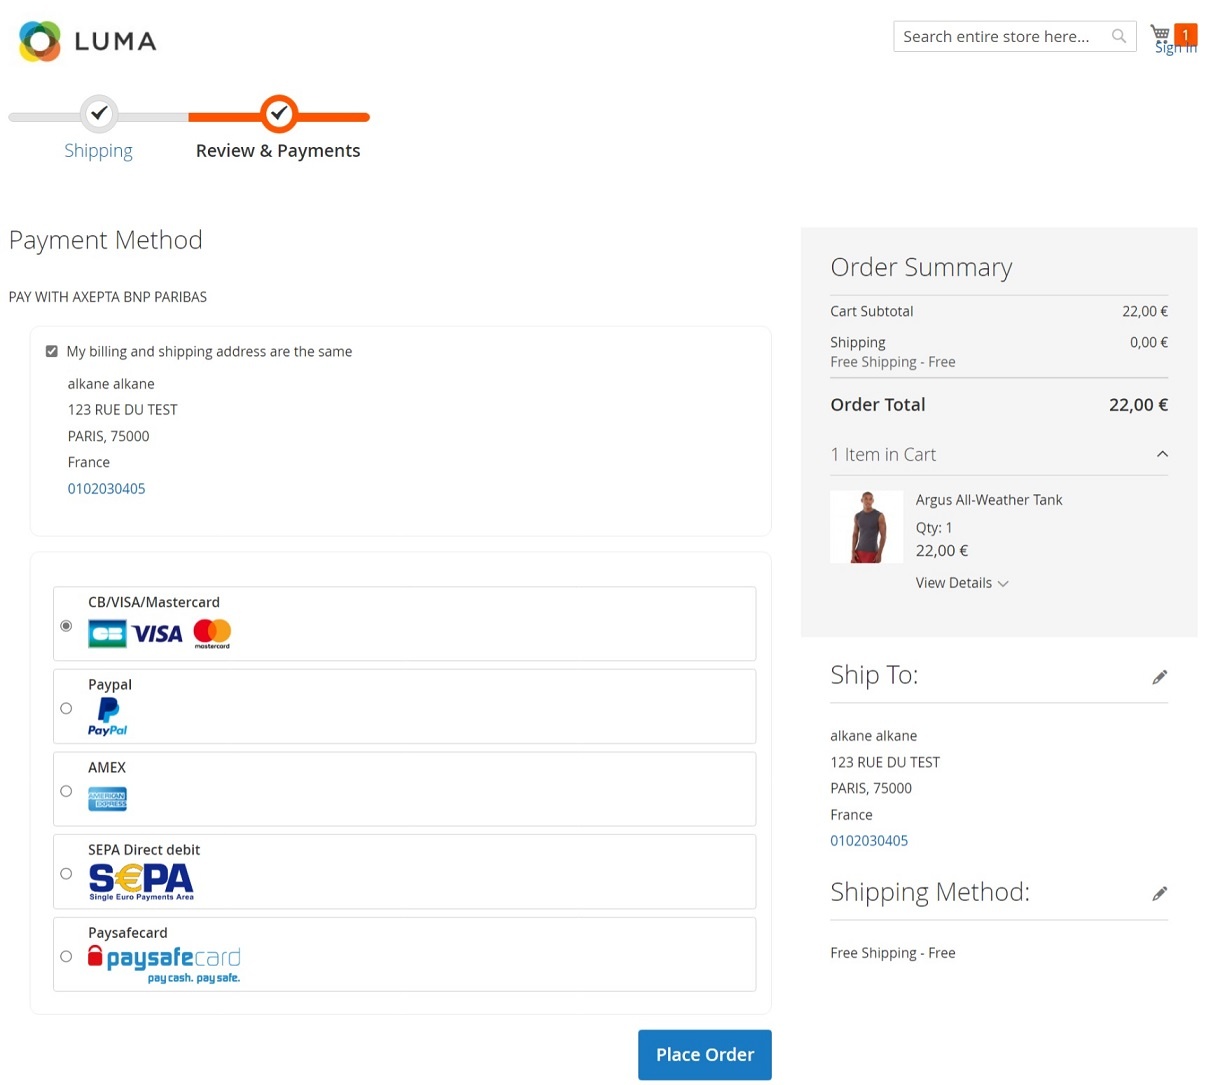
Payment methods are displayed on a framework for 6 proposals. Additional payment methods can be accessed by selecting "More payment options", which only appears if necessary. The "One-click" option is activated here to offer the registration of the card of the user.
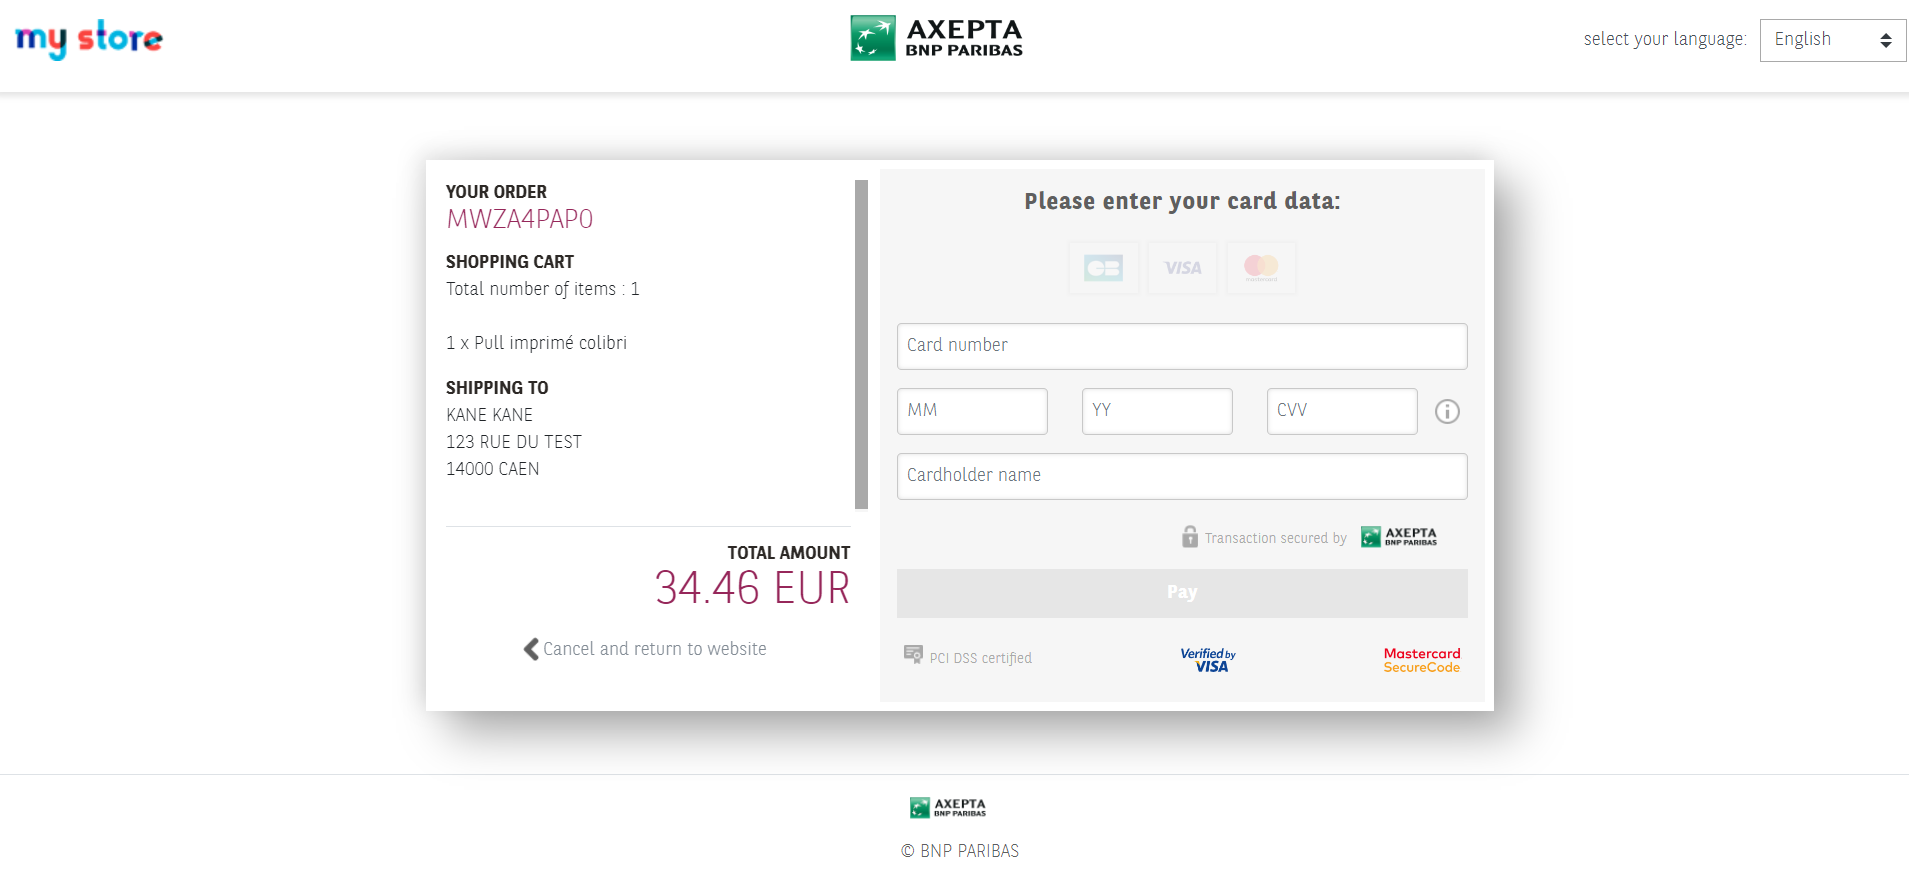
The rendering of a redirected payment page
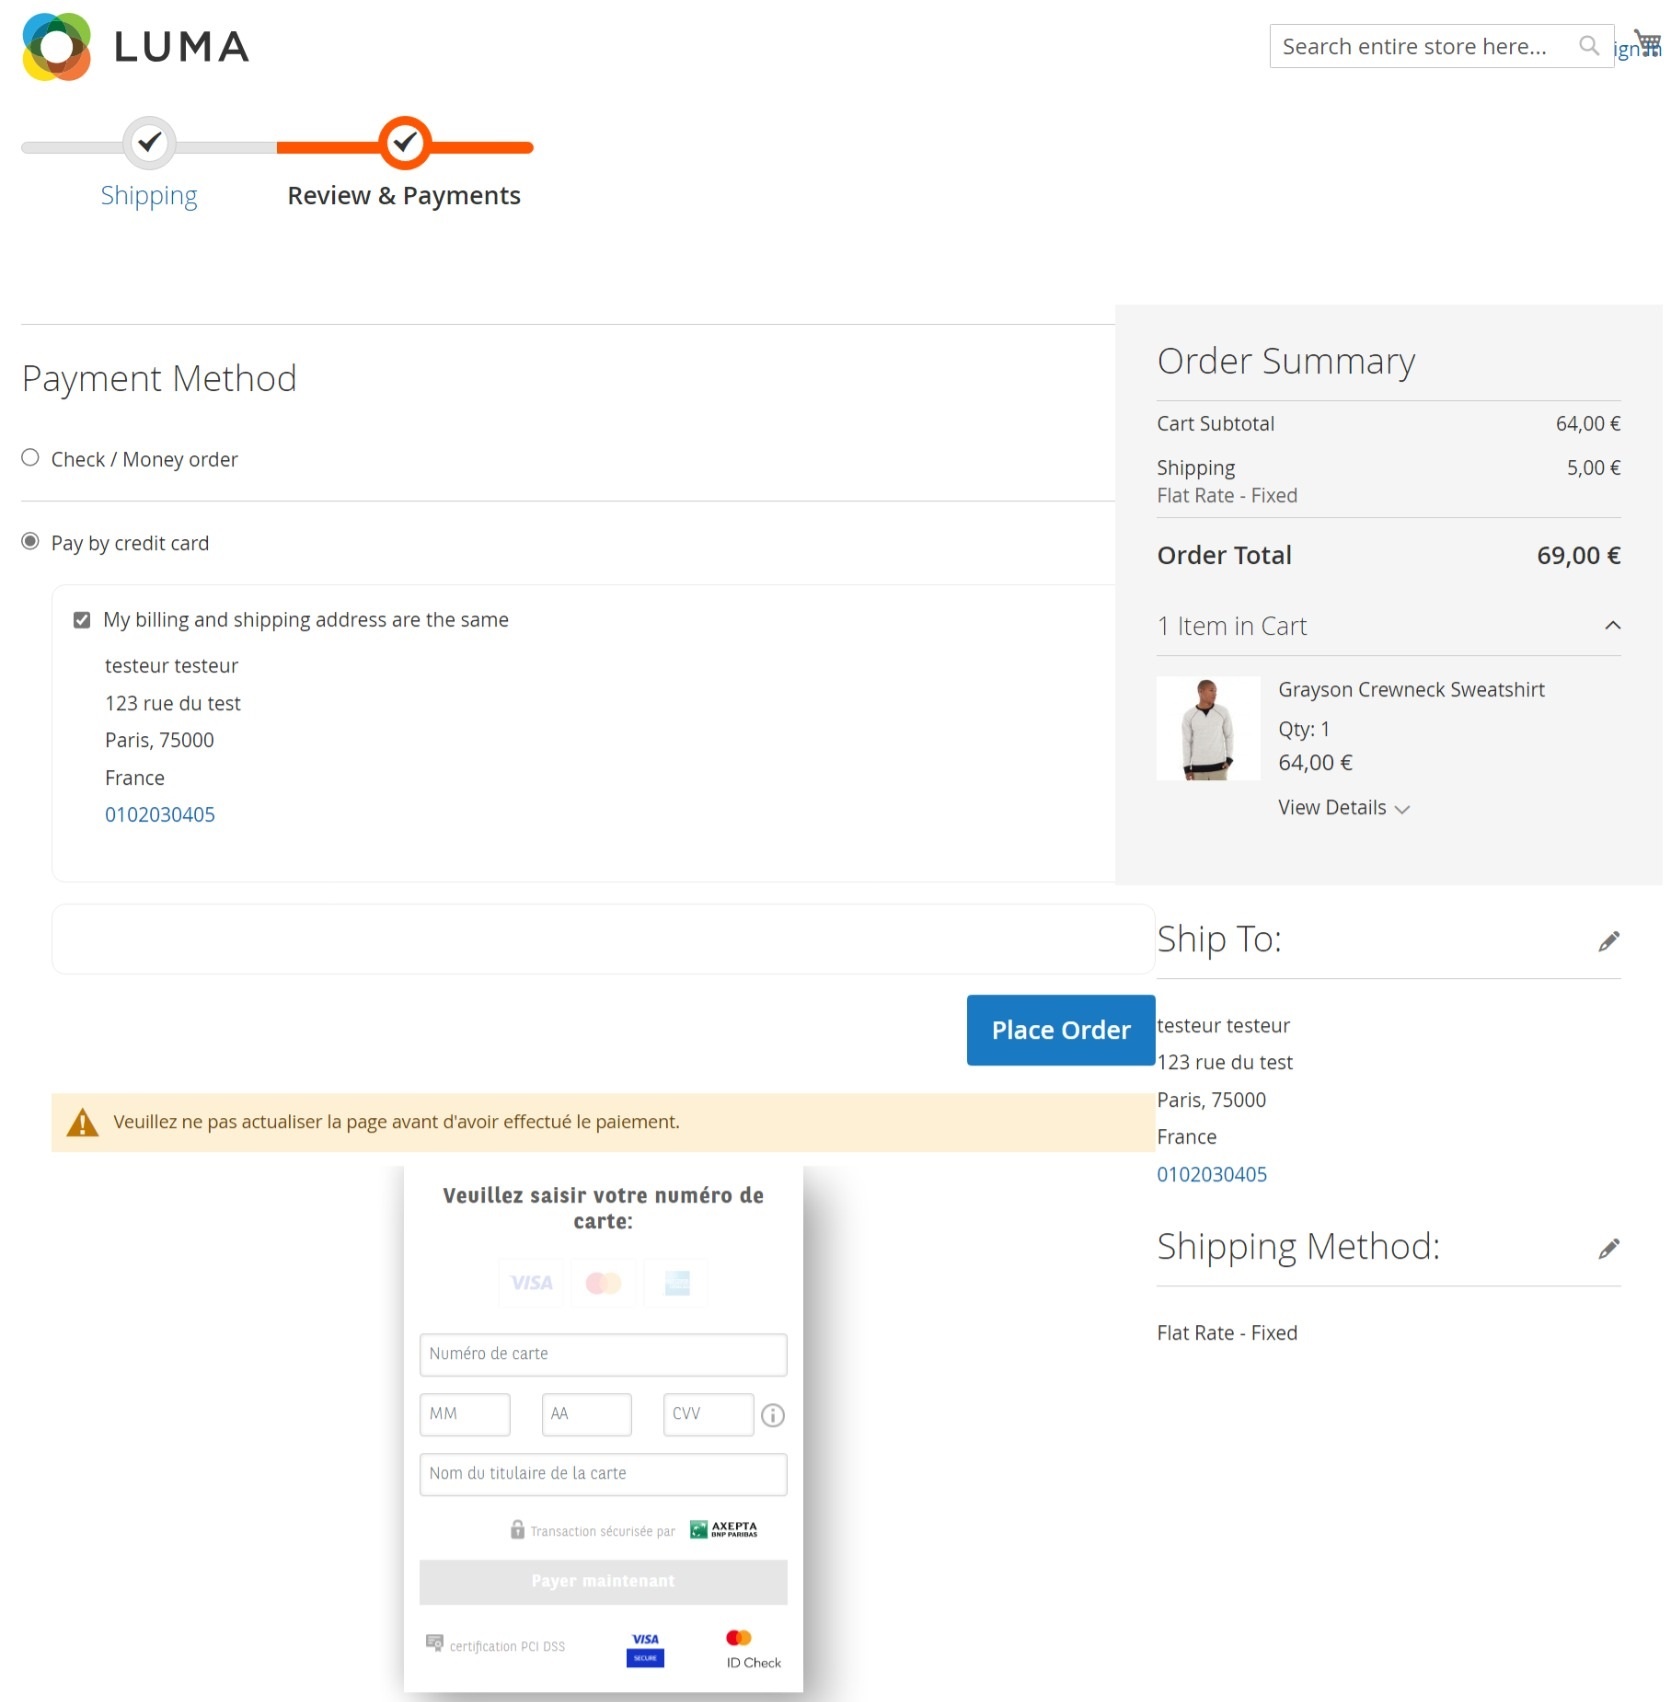
The rendering of an iFrame payment page
Payment modes configuration
...
To enable the one-off payment, go to “Stores" > "Configuration" > "Sales" > "Payment Methods" > "Axepta” and check “Yes” button.

One-click payment
...
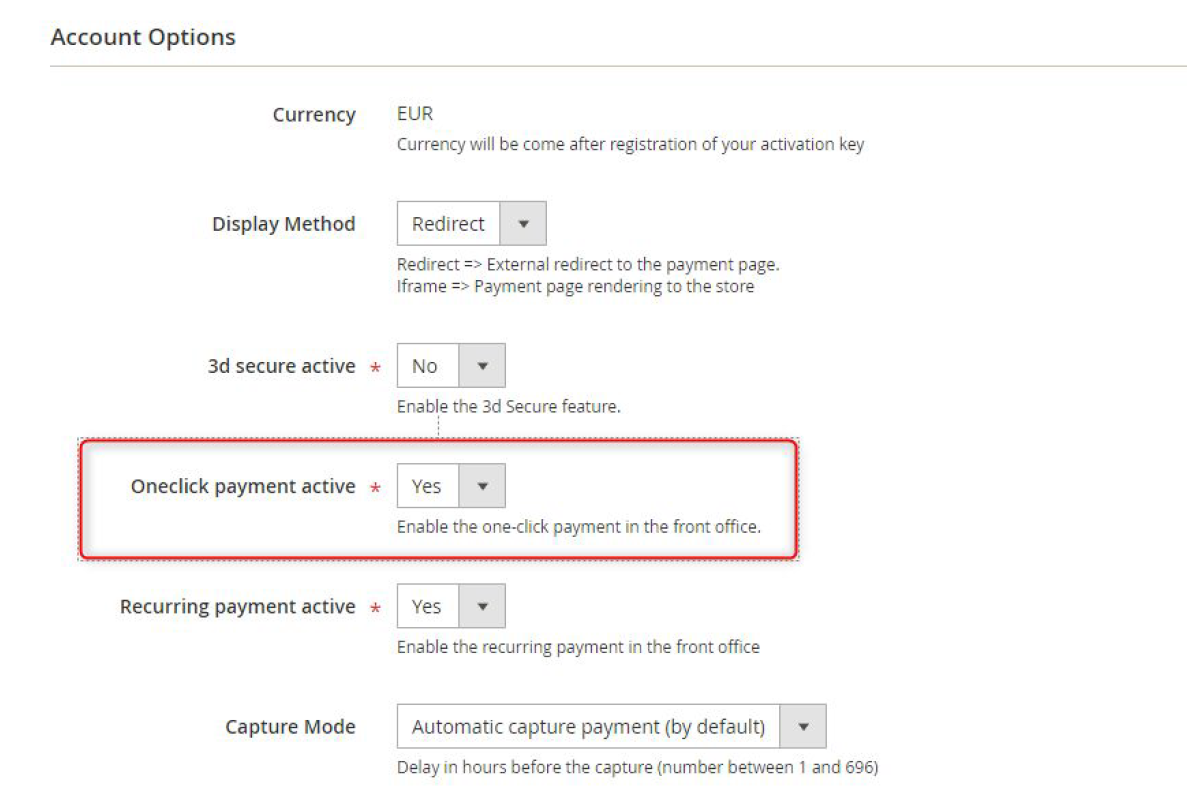
You need to make sure that this functionnality is enabled in your account configurations, to do so, go to "Axepta" > "Axepta Payments configuration BNP Paribas" > Select your MID and click on "Edit" in the "Action" column. > "check the « Oneclick payment active » button
The user will be able to manage his cards in his personal account via “My saved cards” (Front-office view)
Subscription
...
Go to "Axepta" > "Axepta Payments configuration BNP Paribas" > Select your MID and click on "Edit" in the "Action" column. > "check the « » button

Configuration
When the « Subscription » option is enabled, it’s possible to configure items which will be paid by subscription.
...
On the product sheet, you need to go to “Axepta recurring data options” and fulfill the different fields :
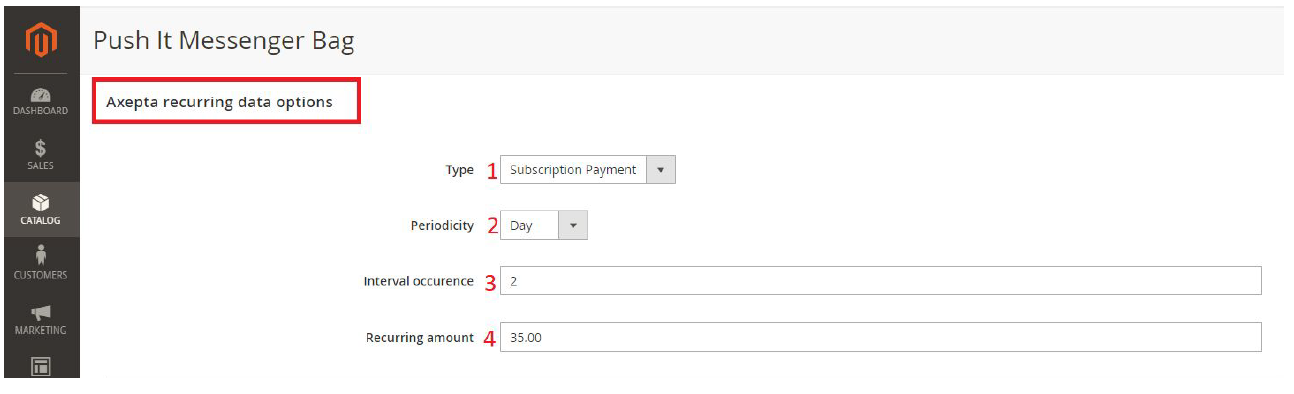
You can now configure the item :
...
- Subscription ID
- Order ID
- Client ID du client
- Product ID
- Associated transaction ID
- Subscription status
- Periodicity
- Date of the last payment proceeded
- Date of the next payment
- Subscription amount
- Action column
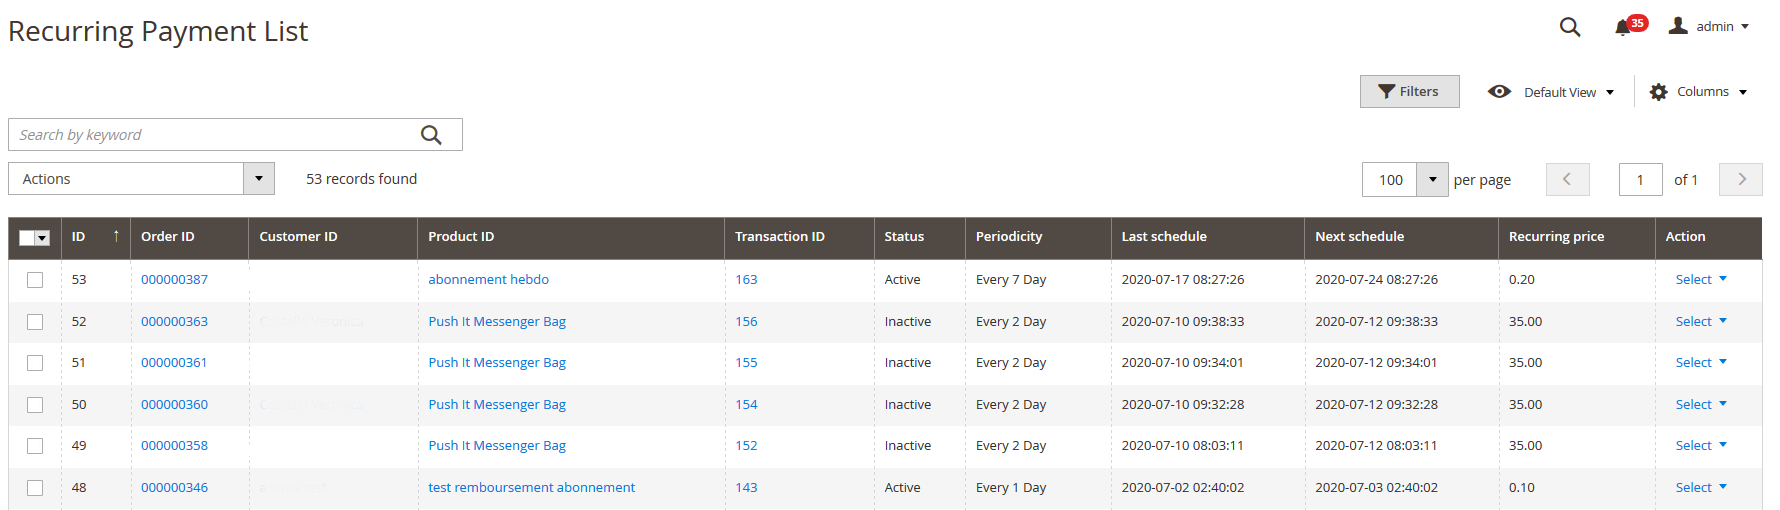
Among the available actions, you can :
...
The user is able to manage his own subscriptions in his personal account > "My subscriptions" section.
The user can also disable a subscription using the "disable" button.
The status of subscriptions will be updated automatically in the backoffice.
...
The complete list of transactions using the different payment methods is available in the section : “Axepta" > "Transaction”.

You will get the details for every transaction :
...
You will find more details about the selected transaction like the PayID (regularly asked by the support in case of issue with a transaction)

Refund / cancellation
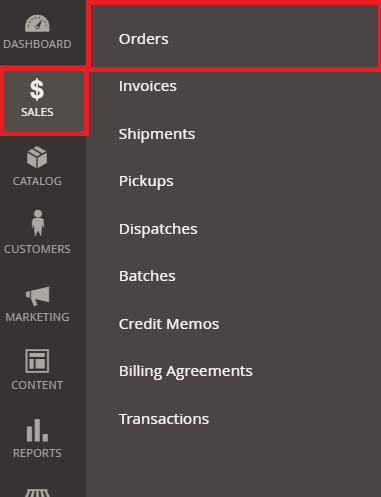
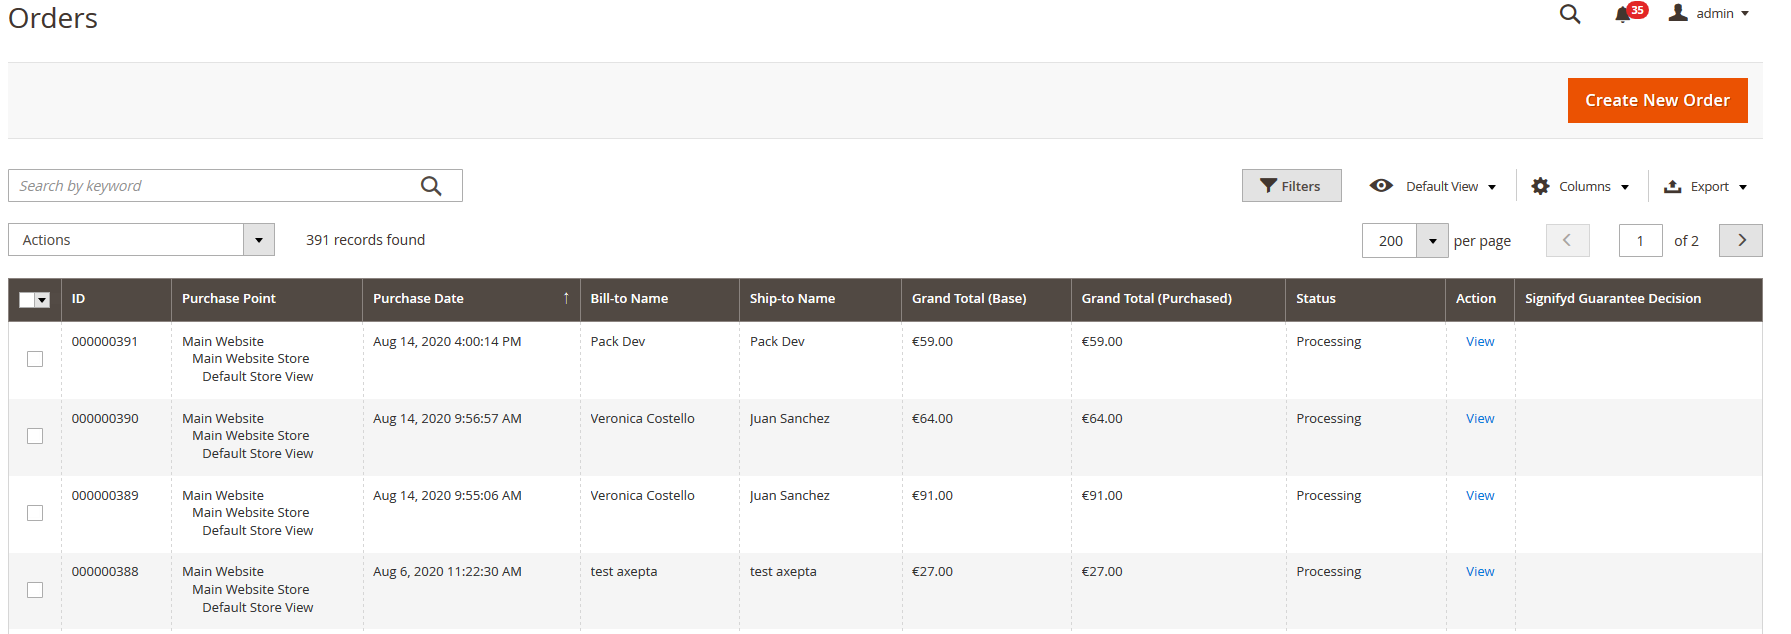
To make a refund or a cancellation (if possible), you will need to go to the tab "Sales" > "Orders" to visualize details about the orders.
- Choose an order among the list then click on “view” to visualize the details about the order.
2. Go to "Invoices” from the same menu and select the invoice that was created automatically for the order.

3. Click on « Credit Memo ». You will get all the information about the order and on the bottom side of he page, the information about the refund.

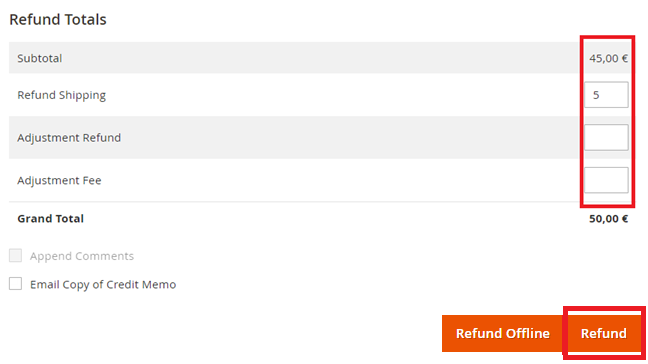
Global refund
For a full refund, you can only keep the values by default and validate. For a partial refund, you can adjust the amounts.
...