Summary
| Table of Contents |
|---|
Introduction
Welcome to the documentation for the AXEPTA BNP Paribas module for WooCommerce.
This free module allows you to easily integrate our online payment solution into your e‑commerce store.
This documentation will guide you through the installation, configuration, and use of the module, ensuring a simple, reliable, and tailored integration for your needs.
| Info |
|---|
The module is available for free at the following address : GitHub - AxeptaBNPParibas/AxeptaOnline-WooCommerce-plugin: Axepta Online plugin for WooCommerce / WordPress · GitHub |
Must have
You must have a fully functional WordPress site and a WooCommerce module.
| Tip |
|---|
Make sure that your WooCommerce and PHP versions are compatible with the Axepta Online module. |
Plugin Setup
Installation via the WordPress interface
For a quick and easy installation, you can download and install the plugin directly from the WordPress admin interface. Follow these steps:
- Download the plugin ZIP file.
- In the WordPress dashboard, go to "Plugins "> "Add New".
- Click "Upload Plugin", then select the ZIP file you downloaded.
- Click "Install Now", and once the installation is complete, activate the plugin.
Installation via FTP/SSH
If you prefer a manual method or have restrictions on the WordPress interface, you can install the plugin via FTP or SSH by following these steps:
- Download the plugin ZIP file and unzip it on your computer.
- Connect to your server using FTP or SSH.
- Navigate to the ''wp‑content/plugins'' directory of your WordPress installation.
- Create a folder named ''axepta-bnp-paribas''.
- Copy all the unzipped plugin files into that folder.
- Open the WordPress admin area, go to ''Plugins'' > ''Installed Plugins'', and ''activate'' the plugin.
Update Plugin
Before any installation, we invite you to fully uninstall the current extension, clear your CMS cache, and verify that the extension has been removed by deleting the module’s installation directory from your FTP server.
Once this is done, you can install the latest update.
| Info |
|---|
The latest version of the module is available on our GitHub : GitHub - AxeptaBNPParibas/AxeptaOnline-WooCommerce-plugin: Axepta Online plugin for WooCommerce / WordPress · GitHub It is updated regularly. Afterwards, remember to complete the Axepta Online configuration settings in each module tab. You will need to re‑enter your production MID and your production activation key, which are available on your BNP Paribas merchant portal. |
Back Office
Plugin Global Settings
The module’s features are accessible through the left‑hand menu in the admin interface ''WooCommerce'' > ''Settings''. To begin configuration, simply click the ''Axepta BNP Paribas'' option.

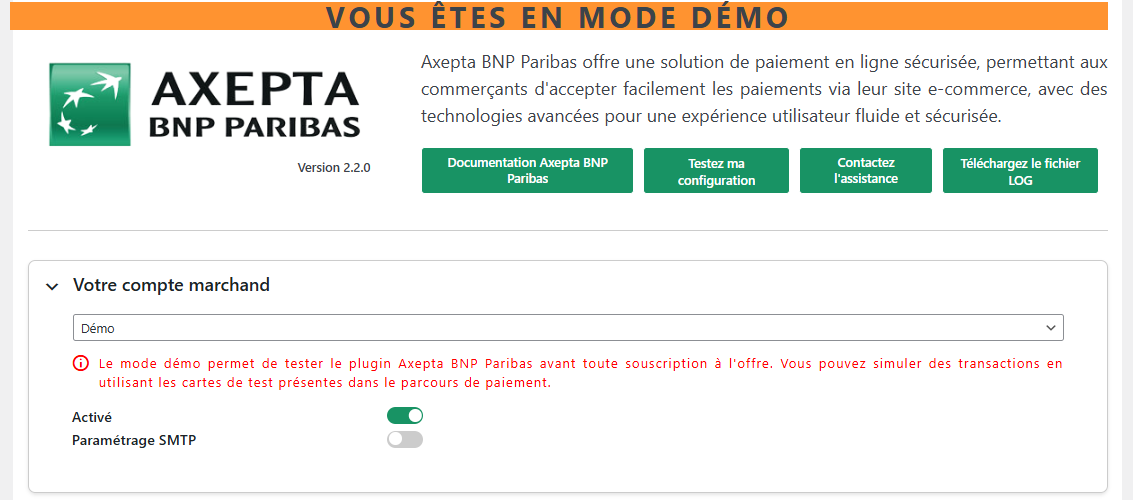
- Documentation Axepta BNP Paribas : links to our official module documentation.
- Test your configuration : allows you to verify that the site environment is compatible with the installed module.
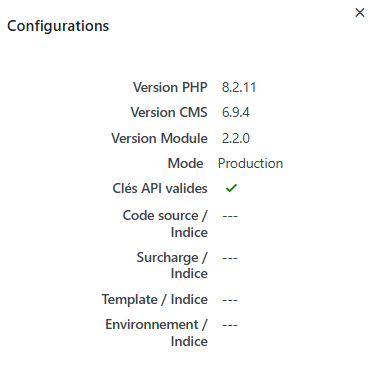
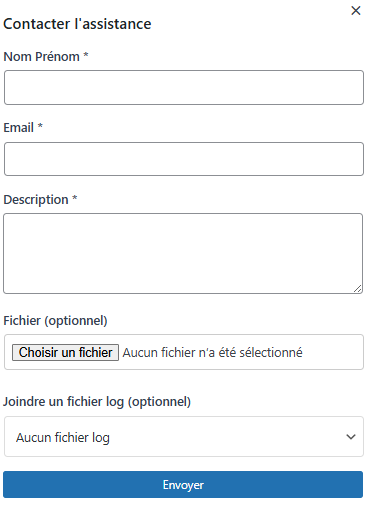
- Contact support : Enables the opening of an email‑submission form to contact our support team. In this email, the server, CMS, and module versions are sent automatically
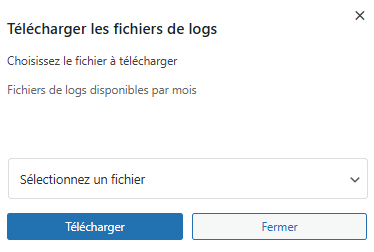
Download the LOG file : Allows you to download the logs in the desired format.
Account Settings

Demo mode
The demo mode (“DEMO”) allows you to test the module and its features without having an Axepta BNP Paribas account.
Test mode
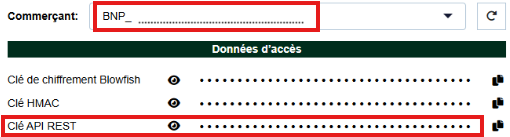
The test MID is available in the “View "View API credentials” credentials" section of your Axepta BNP Paribas Merchant portal.
The test REST API key is also available in the “View "View API credentials” credentials" section of your Axepta BNP Paribas Merchant portal.
This allows you to configure your dedicated test MID, which can be identified by the format BNP_MID_t that you can retrieve from your BNP Paribas merchant portal.
Accès aux identifiants de l’API & HMAC - Documentation Axepta BNP Paribas - Axepta
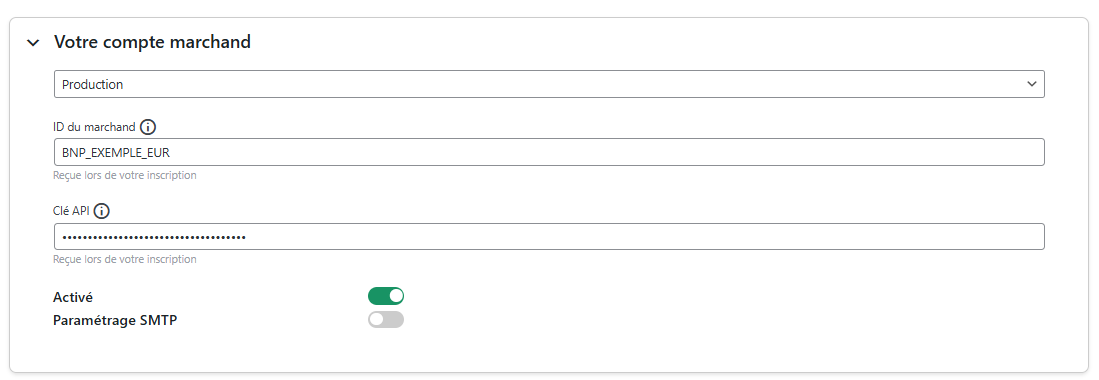
Production Mode
- The production MID is available in the ''"View API credentials'' section " section of your Axepta BNP Paribas merchant portal.
- The REST API key is also available in the ''"View API credentials'' section " section of your Axepta BNP Paribas merchant portal.
Allows you to configure your dedicated production MID, which is recognizable by the format (BNP_MID_XXX) available from your BNP Paribas merchant portal.
Accès aux identifiants de l’API & HMAC - Documentation Axepta BNP Paribas - Axepta
Front‑end activation:
Activating this feature is required to display the payment methods on the checkout page.
| Warning |
|---|
Theese items are saved only when the user clicks the ''Save changes'' button. |
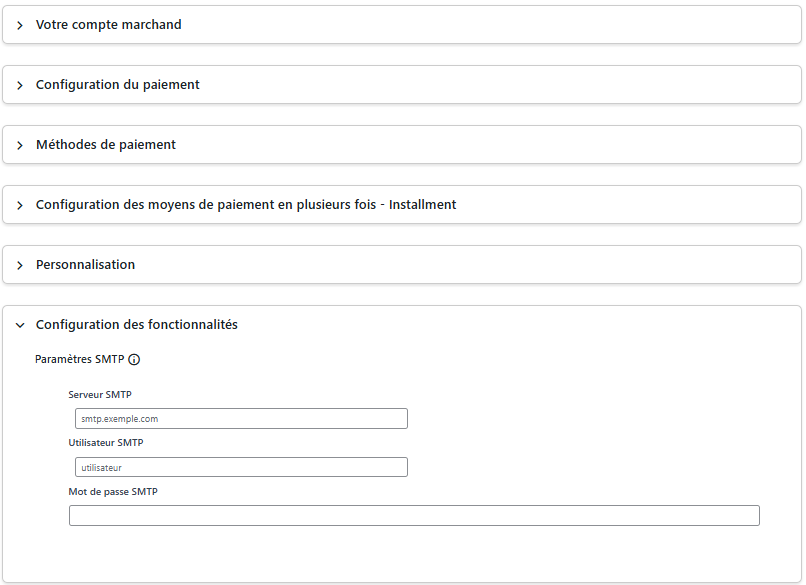
SMTP configuration
Activation of the SMTP (Simple Mail Transfer Protocol) feature used to send e‑mails from a server.
Once activated, a new tab “Feature configuration” becomes available.
Payment Method Configuration
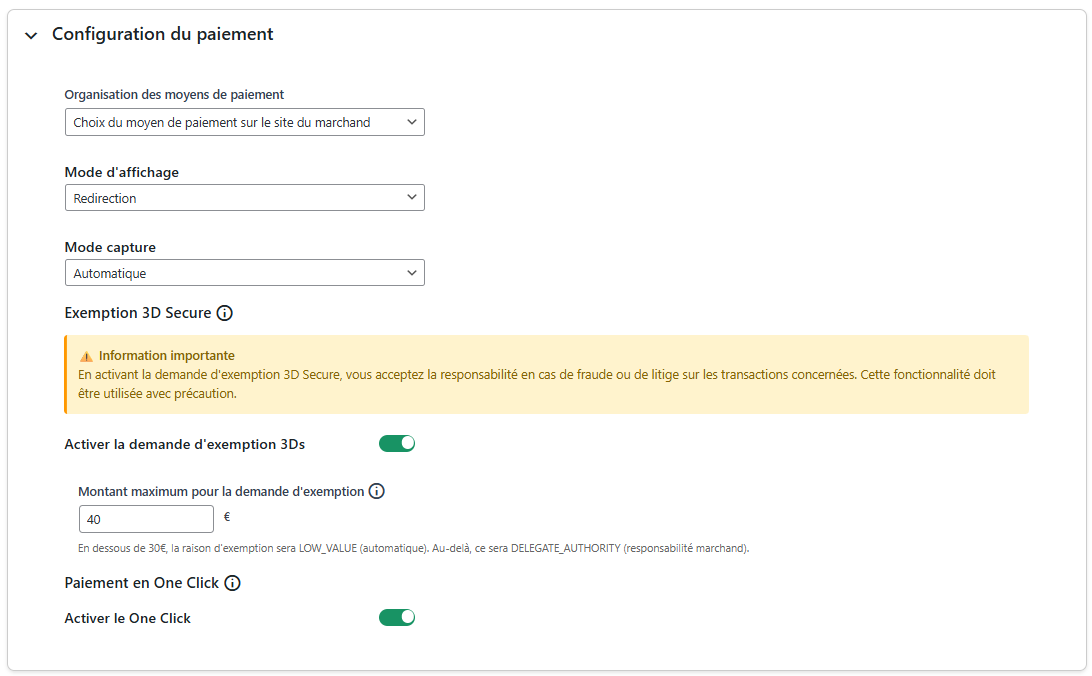
The payment configuration tab lets you set up several features.
Payment methods organization
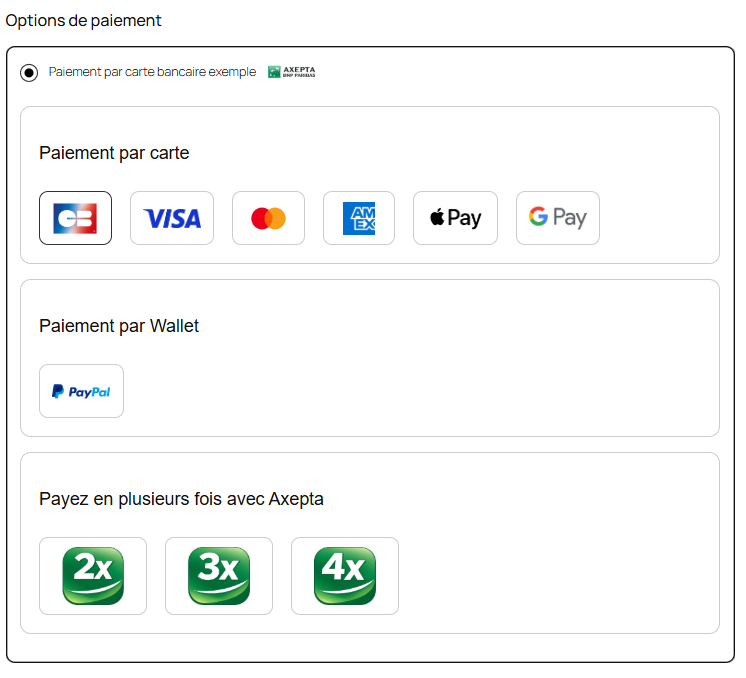
This setting determines how the payment options are displayed on the checkout page.
Two options are available:
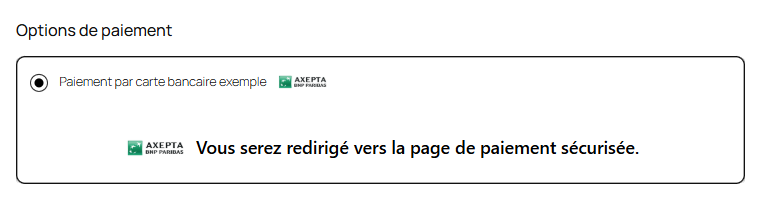
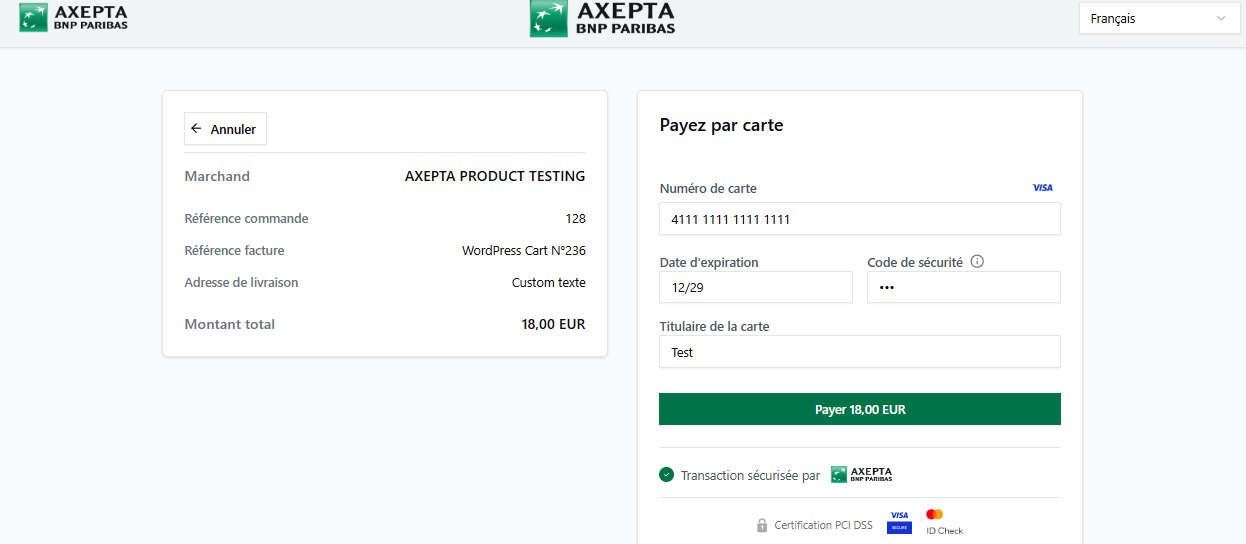
Choose the payment method on the BNP Paribas page
The payment form is hosted by BNP Paribas, you will see the payment methods available in your account.

- Choose the payment method on the merchant’s site
If applicable, this option lets the customer select the payment method directly on your shop before being redirected.
Capture mode
This option allows you to choose the payment capture method.
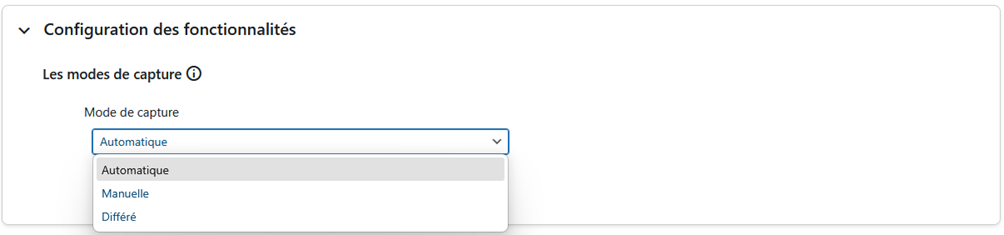
Automatic capture activation
Automatic (J): The capture will be performed automatically at midnight.

Deferred capture activation
Deferred (J + x): You can choose the delay before the capture (delay in hours: an integer between 1 and 696).
Example:
to set a 2‑day delay, enter 48.

Manual Capture Activation
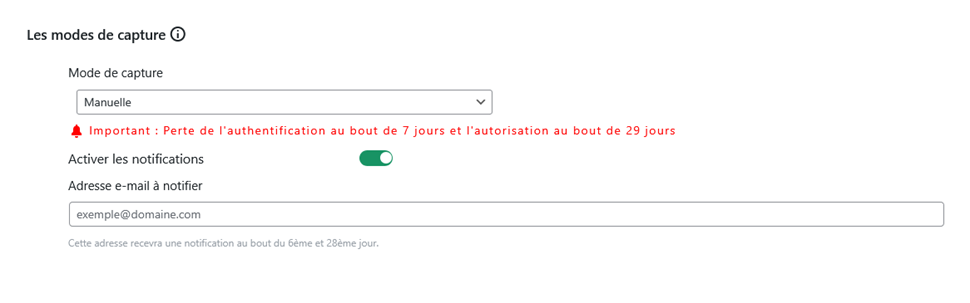
Manual Capture: The capture is performed manually by the merchant through a configuration in the back‑office.
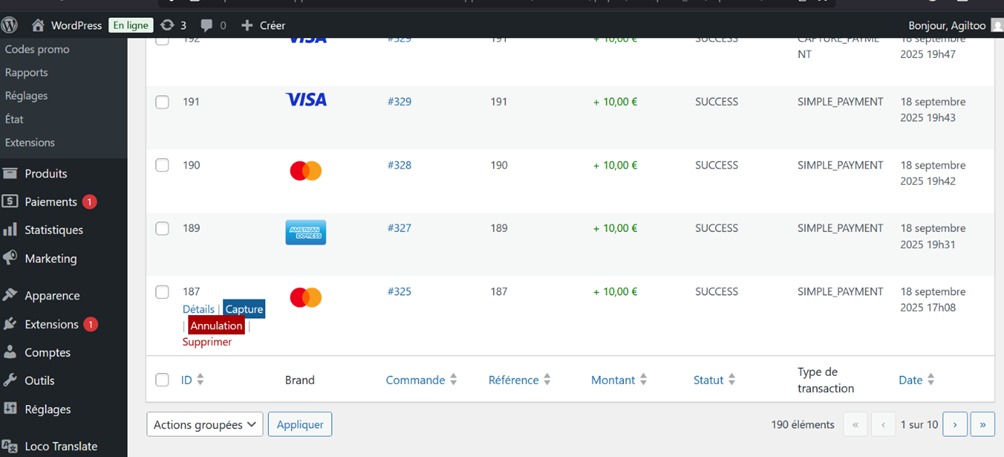
To manually capture a transaction, follow these steps:
- Go to ''WooCommerce'' >'' Transactions'' from your WordPress dashboard.
- You will see the list of processed transactions.
- When you hover over a row that corresponds to a transaction that has not yet been captured, a blue ''Capture'' button will appear below that row.
- Click the ''Capture'' button to perform the payment capture.
Once the capture is completed, the transaction status will be updated to reflect the action.
Manual capture notifications
When a manual capture of a payment is attempted, notifications are displayed to keep you informed about the operation’s status:
- Successful capture: A notification informs you that the capture was completed successfully.
- Capture already performed: If the transaction has already been captured, an alert indicates that the capture cannot be redone.
- Failed capture: In case the capture fails, a detailed notification explains the reason for the problem and guides you on the steps to take.
These notifications allow you to precisely track the status of each transaction and act accordingly.
| Tip |
|---|
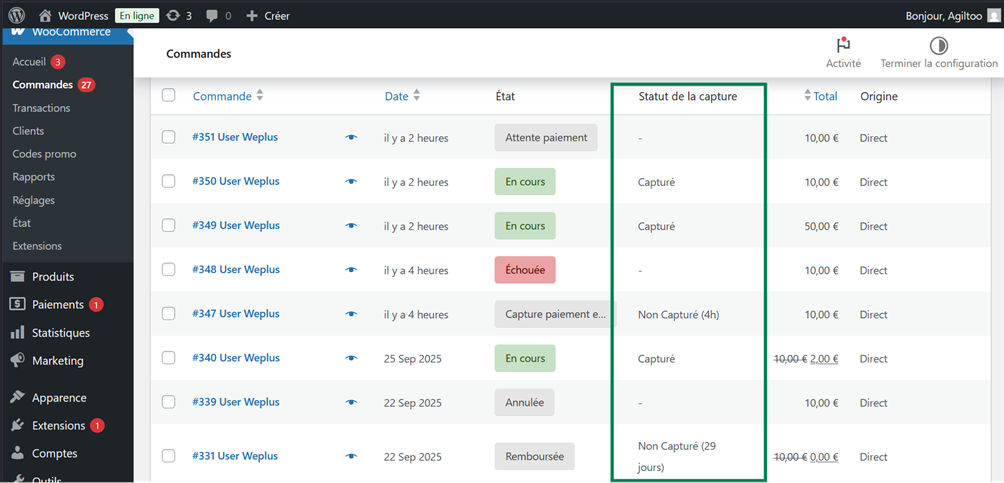
In the "Orders" tab, a "Capture Status" column has been added to the list of orders in WooCommerce. This column indicates whether the payment transaction has been captured or not. If the capture has not yet occurred, the elapsed time since the capture request will be displayed.
|
| Warning |
|---|
Warning: Without action from the merchant, the transaction will not be transferred to the bank. Capturing a transaction after the 7th day results in the loss of the guarantee associated with 3D Secure. After the 29th day, the authorization granted by the issuer is no longer valid. Therefore, it is advisable to capture transactions before these deadlines |
3DS Exemption
It corresponds to the 3DS settings (the payment authentication method) and its exemption based on the total customer's cart amount.
| Warning |
|---|
By enabling the 3D Secure exemption request, you accept responsibility in the event of fraud or dispute on the affected transactions. This feature should be used with caution. You can find the various responsibilities in case of non‑payment on our dedicated page: Liability Shift and 3D-Secure Matrices - Documentation Axepta BNP Paribas - Axepta |
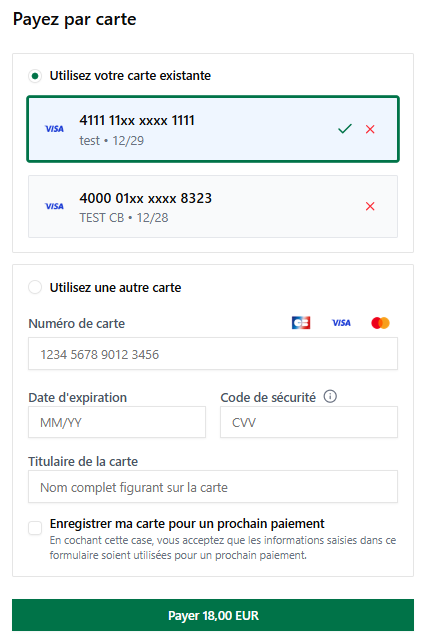
One‑Click activation
Enabling this feature allows logged‑in customers to save their card for future payments.
To do so, the customer must first check the ''Save card'' option on the payment page.
Payment Method

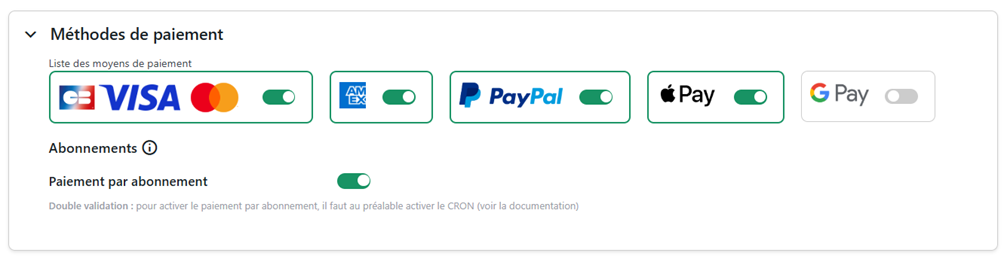
It is up to the merchant to enable or disable the subscribed payment methods.
| Info |
|---|
If CB‑Visa‑MasterCard is enabled, the CB logo will appear only when the order’s shipping country is France. |
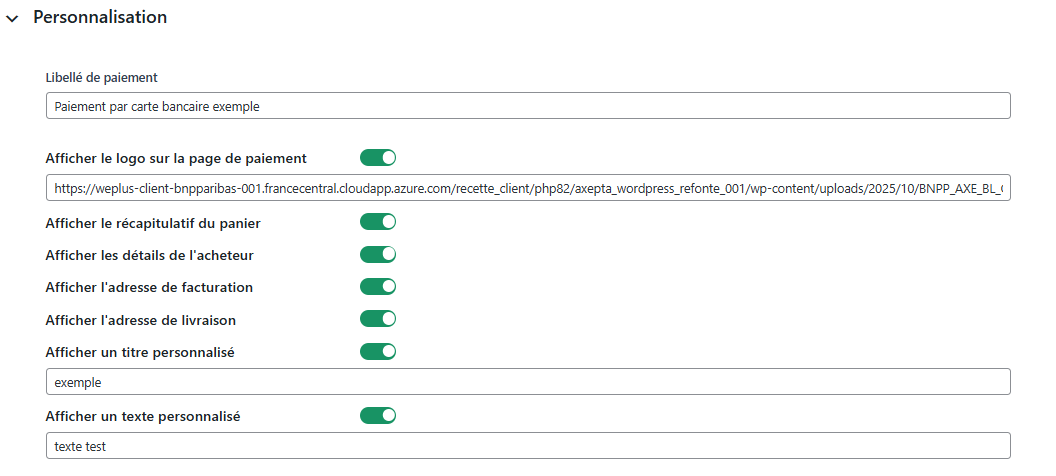
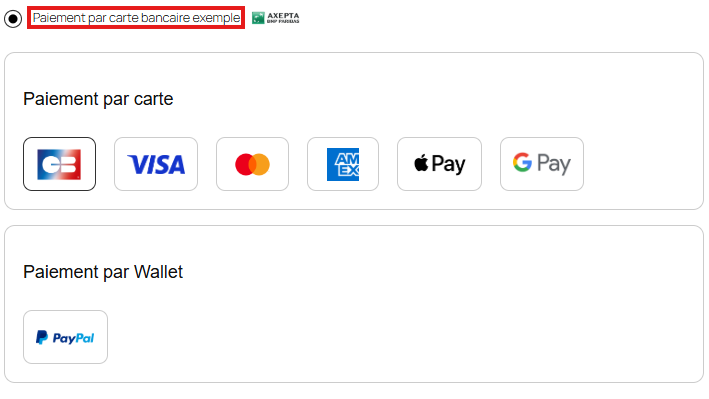
Customization
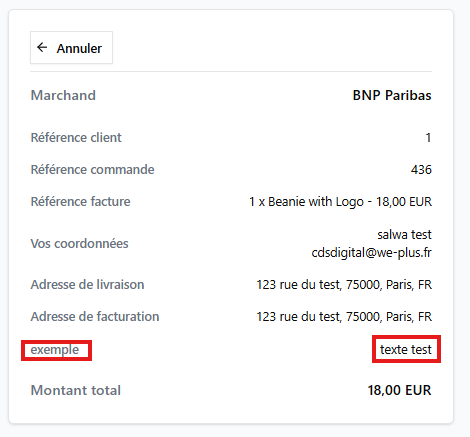
Allows you to configure the fields sent in the payment form, during the redirect.
Subscription settings
To enable subscription payments, go to the Payment Methods tab.
- Navigate to ''WooCommerce'' > ''Settings'' > ''Payment Methods''.
| Warning |
|---|
To configure the general subscription settings such as billing cycles, trial periods, and renewal options, you must first create a subscription product record. |
Create a subscription product
In ''WooCommerce'' > ''Product'' > ''All Products'', open the product you want to sell as a subscription (or create a new one).
In the ''Subscription Settings'' section, tick ''Enable subscription for this product.''

Once enabled, you can define the following elements:
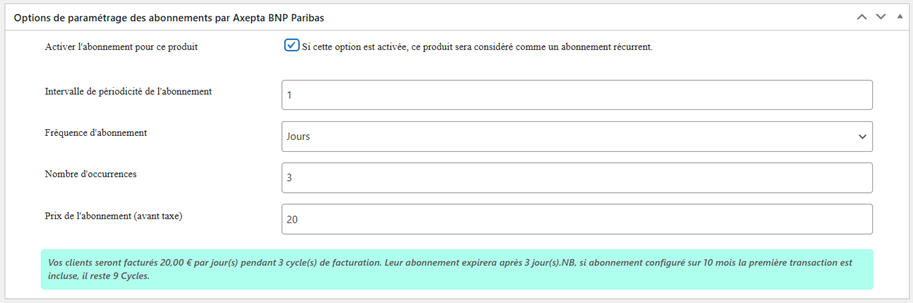
Billing frequency
Subscription periodicity interval:
- Specify the number for the interval (e.g., 1, 2, 3, …).
Frequencies:
- Day(s) / Month/ Years

Example:
1 + Month → billing every month
15 + Days → billing every 15 days
Duration:
- The number of occurrences equals the number of times the customer will be billed.
Example:
3 → 3 payments in total (according to the chosen periodicity)
Amount:
- Subscription price (pre‑tax): amount charged for each period
Save / update the product.
Manage ongoing subscriptions

In the ''WooCommerce'' > ''Subscriptions'' tab you will see a list showing:
- the original order
- the customer
- the product
- the billing frequency
- the last execution date
- the next execution date
- the status
For each subscription line, an “Action” menu allows you to perform management operations.
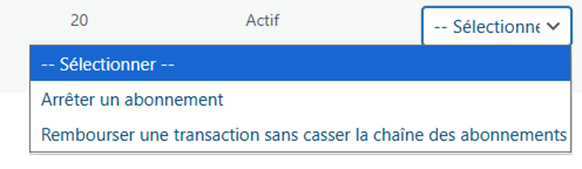
Stop a subscription
Action : Stop a subscription
Effect :
- The subscription status changes to stopped (no further automatic renewals).
- The customer will no longer be billed from that point onward.
Refund a single installment only
Action : Refund a transaction without breaking the subscription chain
Effect :
- You refund the latest transaction (a payment) linked to the subscription,
- without stopping the subscription: future renewals remain scheduled and will continue.
Installement Settings
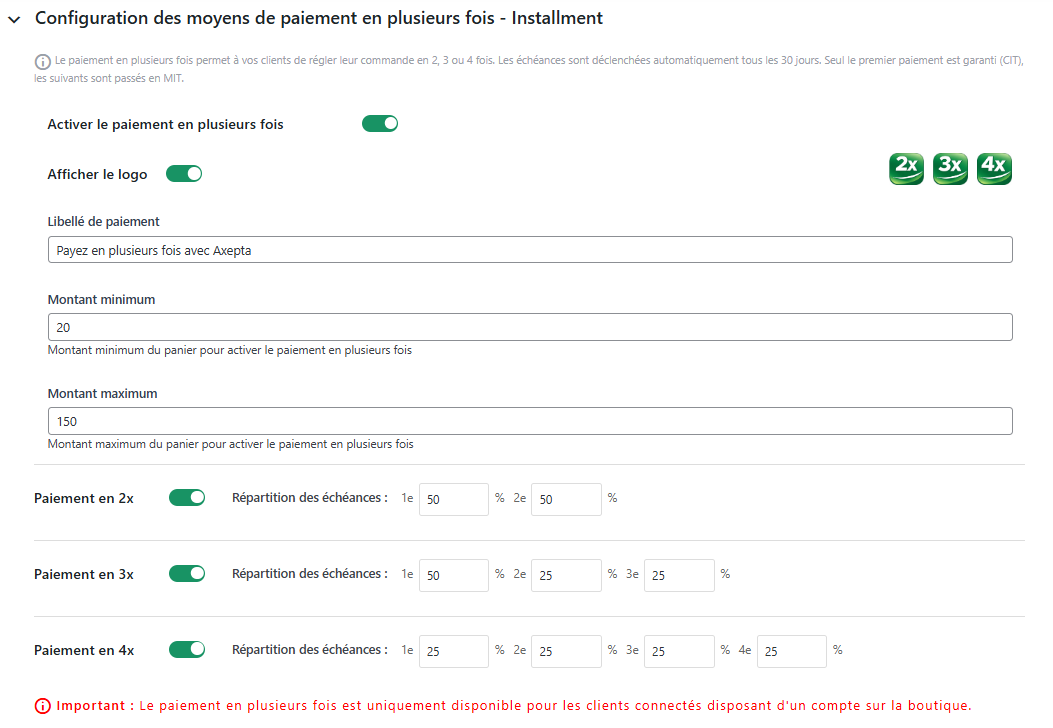
Payment label: Customizable text displayed on the checkout page.
Minimum amount: The minimum cart total required for the installment payment option to be offered.
Maximum amount: The maximum cart total for which the installment payment option will be offered.
Installment distribution: The percentage split of the total cart amount across each installment.
Example of 3X installment payment for a €100 total amount :
- 1st installment: 50 % → €50
- 2nd installment: 25 % → €25
- 3rd installment: 25 % → €25
| Warning |
|---|
The allocation is configurable in percentages, not in monetary amounts. |
Refund / Cancellation
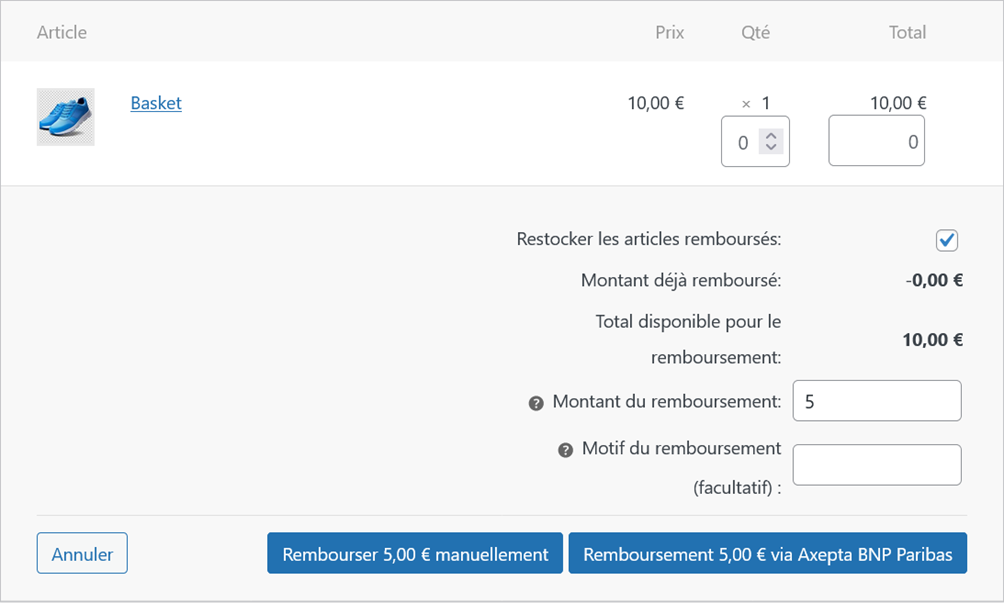
Refund
- Go to WooCommerce > Orders and click on the order you want to refund.
- On the order page you’ll see the relevant details for that order.
- A Refund button will be visible – click it to open the refund section.
- When the section opens, enter the refund amount and, optionally, a refund reason.
- After completing the fields, click “Refund X.XX € with Axepta BNP Paribas” to process the refund.
- The refund will be carried out only if the order has already been captured.
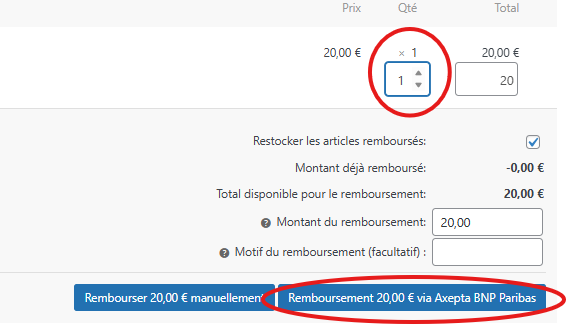
Total refund
To perform a full refund:
- Click on ''Refund''.
- Select the total quantity of products from the original cart, or manually enter the total amount to be refunded in''Refund amount''.
- Click ''Refund via Axepta BNP Paribas'' to update the Axepta back‑office.
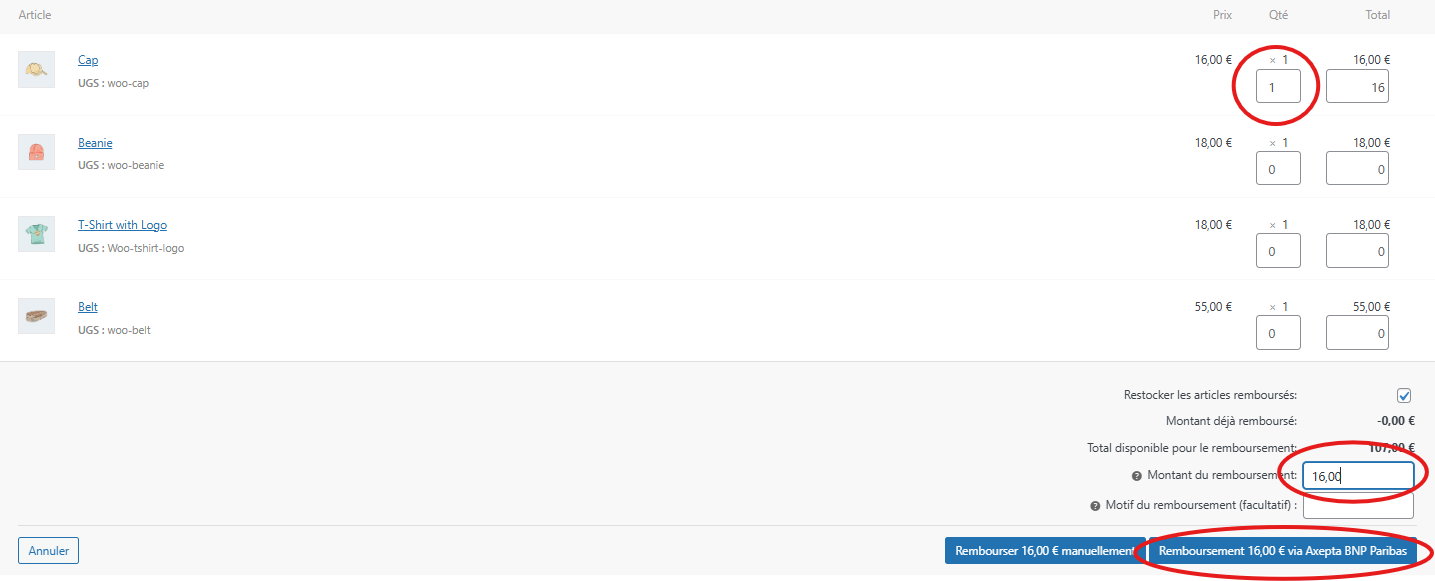
Partial Refund
To partially refund a transaction:
- Click on ''Refund''
- Select the quantity of the product you want to refund in the cart listing, or manually enter the amount to be refunded in the ''Refund amount'' field.
- Click ''Refund via Axepta BNP Paribas'' to update the Axepta back‑office.
Cancellation
If the transaction has not yet been settled (status “processing” when you click on the order ID), you can cancel it via ''WooCommerce'' > ''Transactions''.
To cancel an order whose payment has not been captured yet, follow these steps:
- Go to ''WooCommerce'' >'' Transactions''.
- Locate the transaction associated with the order number you want to cancel, and verify that the payment capture has not been performed.
- Once you have found the transaction, click the ''Cancel'' button to cancel the order.

Logs
Logs are continuously enabled.
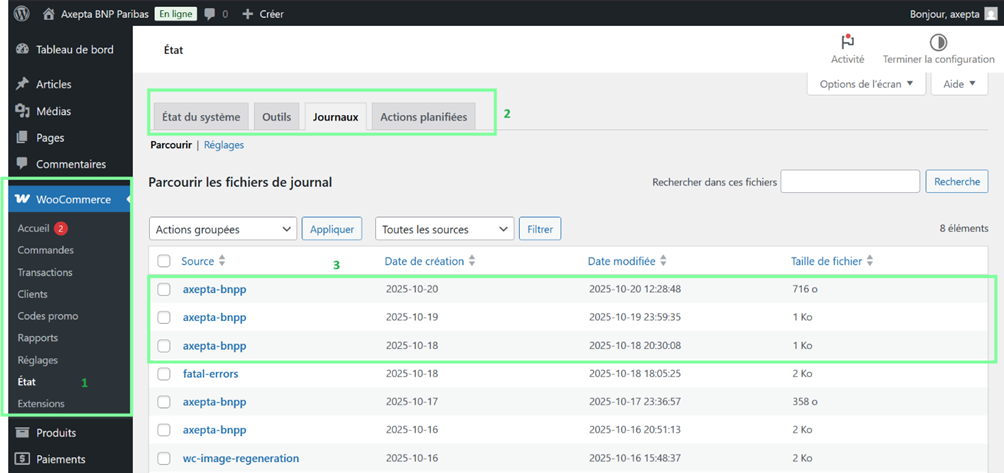
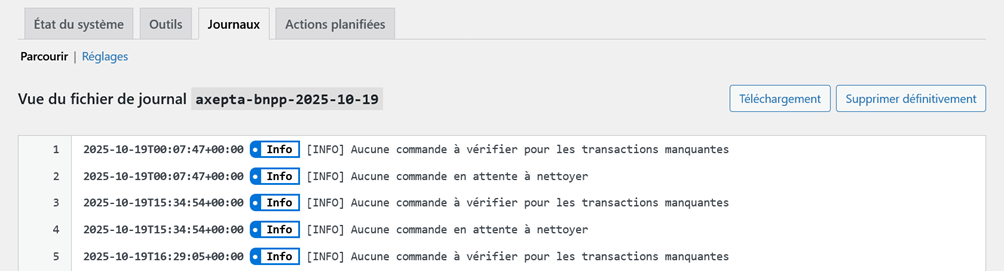
To view or download them, go to ''WooCommerce'' > ''Status'' > ''Logs'', then select the ''axepta‑bnpp'' log. On the next page you can view the logs and download them by clicking the ''Download'' button.