
| Page properties | ||||
|---|---|---|---|---|
| ||||
|
Vous pouvez utiliser le bouton "Créer un nouvel utilisateur" pour créer un nouvel utilisateur pour sur le portail marchand dans l’onglet "Administration → Gestion des utilisateurs". En créant de nouveaux utilisateurs, vous pouvez accorder l’accès à portail à plusieurs personnes. Cela présente l’avantage de vous permettre d’assigner des zones de responsabilité et de consulter les activités de chaque utilisateur dans le portail.
Création d’un nouvel utilisateur

Bouton "Créer un nouvel utilisateur"
Procédure pour créer un nouvel utilisateur :
- Cliquez sur le bouton "Créer un nouvel utilisateur".
→ La fenêtre "Créer un nouvel utilisateur" s’ouvre.
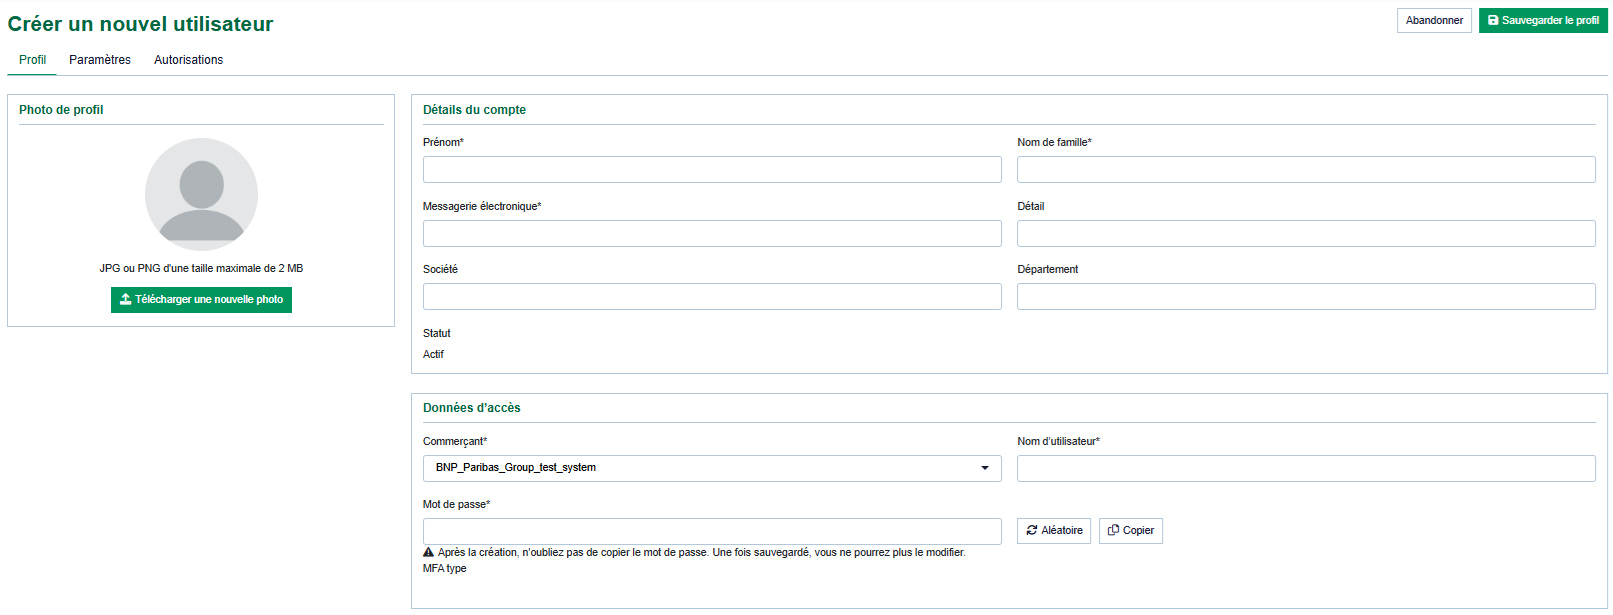
- Détails du profil et du compte
- Paramètres
- Autorisations
| Info | ||
|---|---|---|
| ||
Vous ne pouvez pas modifier le nom d’utilisateur après la création. Le nom d’utilisateur ne peut être changé que par le support Axepta, pour des raisons de sécurité. |
| Info | ||
|---|---|---|
| ||
You cannot enter a password for the new user. The new user will be automatically sent the password valid for use with their access data. You can change the password in the user management once the user has been created. Make sure that you change the password before handing over the access data. Otherwise, your password may be passed on to unauthorized persons.En tant qu'administrateur, vous ne pouvez pas saisir manuellement de mot de passe pour le nouvel utilisateur. Un mot de passe valide sera automatiquement envoyé au nouvel utilisateur pour son accès au portail. |
2. Enter the user name and password.
3. Enter the personal data.
4. Select the localization data and search settings.
| Info | ||
|---|---|---|
| ||
Operations can only be displayed and created with the correct time data as long as you have selected the right time zone for the user. |

5. Select the site access rights. A description of the site access rights can be found in the Manage User Section.
| Info | ||
|---|---|---|
| ||
| When you activate a higher-level site access right (indicated in bold type), the corresponding lower-level site access rights are shown. All lower-level site access rights are shown in Fig. Site access rights. |

- View operations
- Change operations
- Analytics Data Products
- Customers
- Settlement files
- Batch files
- Data Export
- Administration
- Terminal
- Blacklist
- Blacklist securepay
- Whitelist
- Whitelist securepay
| Linchpin Teaser | ||||||||
|---|---|---|---|---|---|---|---|---|
| ||||||||