
| Table of Contents | ||
|---|---|---|
|
AXEPTA BNP Paribas allows you to accept payments using different payment methods. Each of them offers different possibilities, through an e-commerce platform, such as:
...
The installation of the plugin requires the following steps :
1) Go to the "Extensions" tab from the left side of the backoffice of your shop, and click on « Add »


On the next screen, click on "upload Upload an extension" and upload the plugin. Once uploaded, click on "install".
...
Once the plugin installed, you can disable or delete it.
2) Back to "Extensions/" > "Installed extensions" , search for “Axepta”, and select from the menu on the left of the screen, find the "Axepta Online BNP Paribas" plugin :by scrolling through the list or searching for "Axepta" on the search bar.

Global configuration of the plugin
...
To create a new configuration, go to the tab "woocommerce/configurations""WooCommerce" > "Configurations" on the left side of the screen.
Click on the tab “Axepta configuration” to display the list of all your configured accounts and add others.


To add a new account, click on the "Add account" button
...
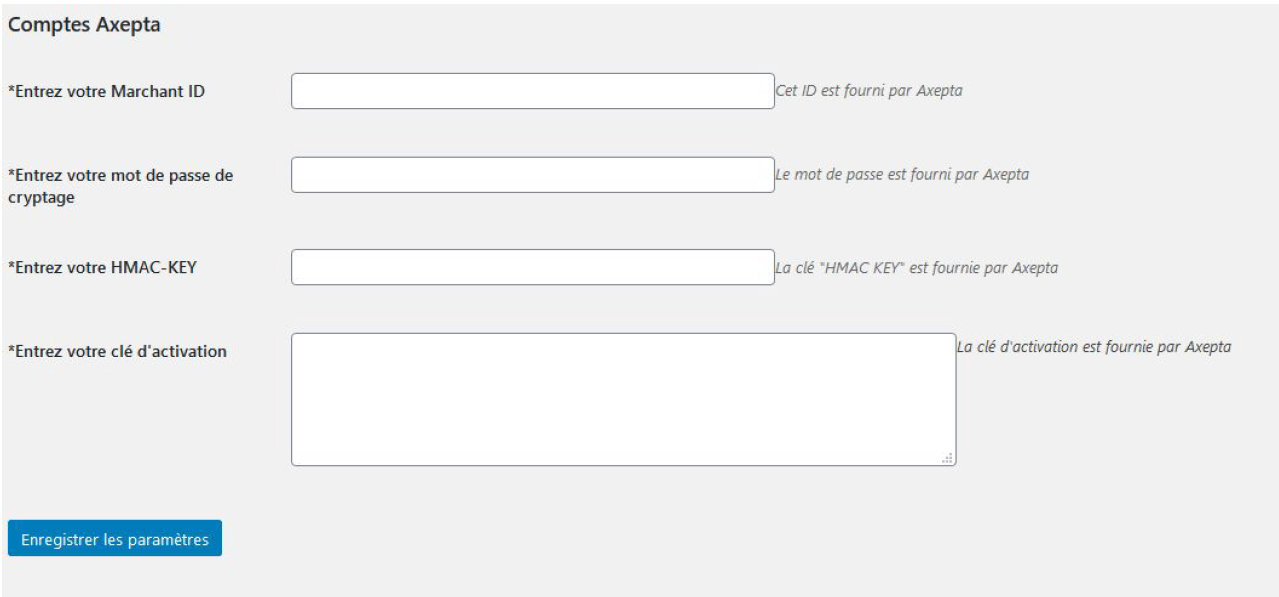
You should, then, fill the required data provided by BNP Paribas and click on "Save".
Une fois la configuration ajoutée, vous pouvez cliquer sur le bouton "configurer" pour passer à la configuration des moyens de paiement et des fonctionnalités à activer (options de paiement).
Once the configuration saved, you can click on "configure" to manage You can now choose the different payment methods and functionalities you would like to activate on your shop.
...
You can now configure your account options.
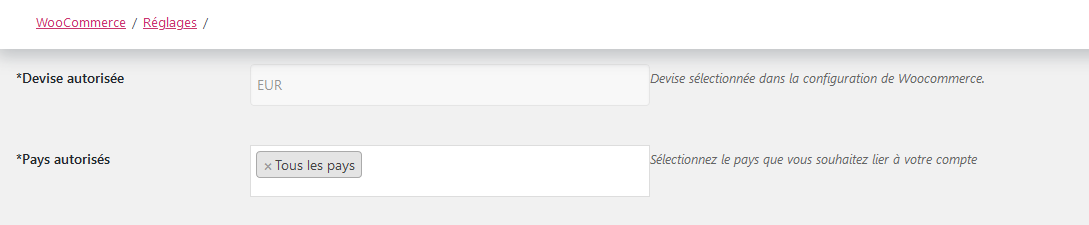
Country :
You can choose to activate the account either in all countries or in manually selected countries by holding down the ctrl key.
Currency :
The currency indicated is the currency of your activation key. This data cannot be modified, it is only shown as an indication for the management of the account.
Please note that you must activate the currency beforehand in the woocommerce backoffice. To do this, go to "GeneralWooCommerce" > “General” and find the tab "Currencies options' .


...
Country :
You can choose to activate the account either in all countries or in manually selected countries by holding down the ctrl key.
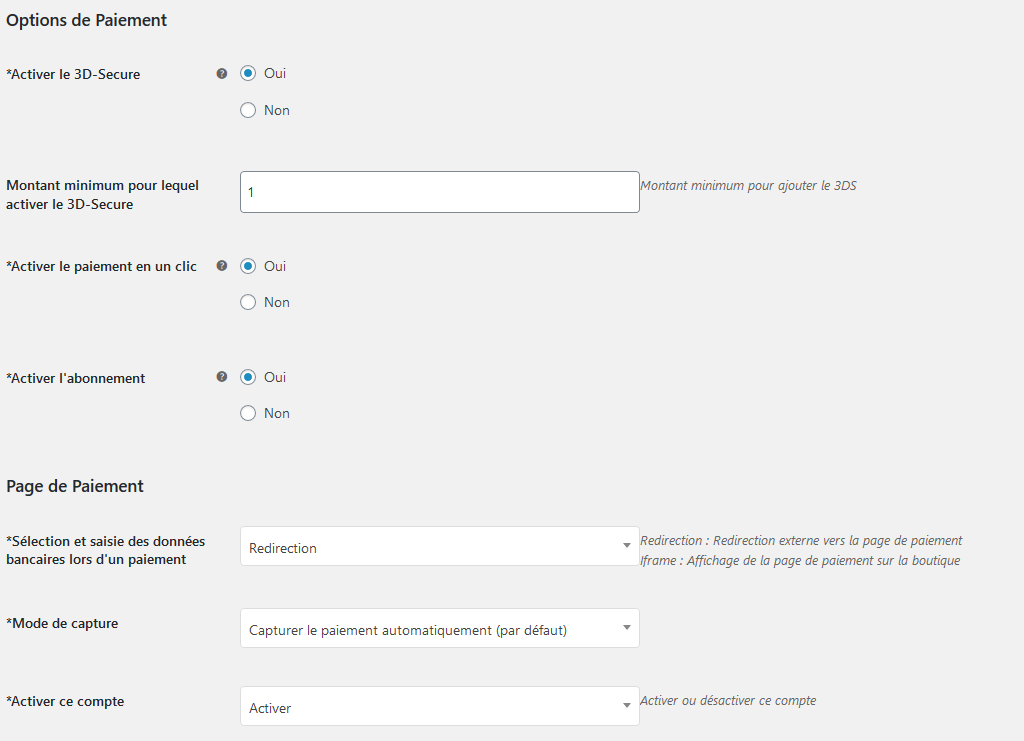
3DS :
This option allows you to activate 3DS authentication and indicate the minimum amount for 3DS transactions.
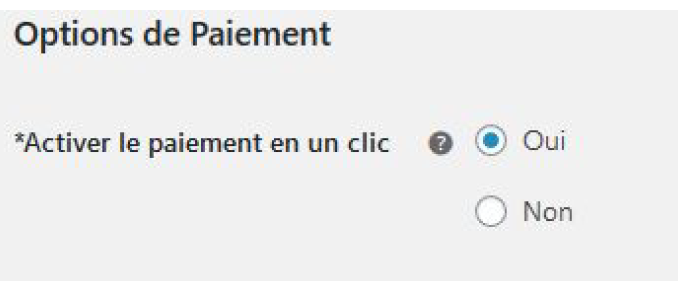
One-click payment :
This option allows you to activate the oneclick payment via registration of the payment method by the user in his customer account.
...
- Automatic => The capture will be done automatically in the night.
- Manual => After a defined time, you can choose just after choosing this option the delay before the capture (Delay in hours before capture (integer between 1 and 696)).
Your account is now configured.
You can configure as many accounts as your BNP Paribas contract allows. To add an account, you must go to "Axepta payment configuration" and do the same operations. The list of accounts will be updated with each new registration.
You can also disable a configuration.
Payment modes configuration
...
One-off payment
To activate the Axepta standard one-off payment, you must go to the "WooCommerce" > "Payments" tab on the left side of the screen, and check "Axepta".


When you click on the button on the right side, you can configure the payment by checking the "activation" box.
You can also enable the logs in the screen(this can help the support to analyse transactions).

...
One-click payment
This functionnality allows your customers to save their payment methods data so that they can pay faster the next time.To enable this functionnality, you only need to check the « Oneclick payment » button
You need to make sure that this option is enabled in your configuration ("WooCommerce" > "Axepta Configuration" > "Configuration" of the MID of your shop.
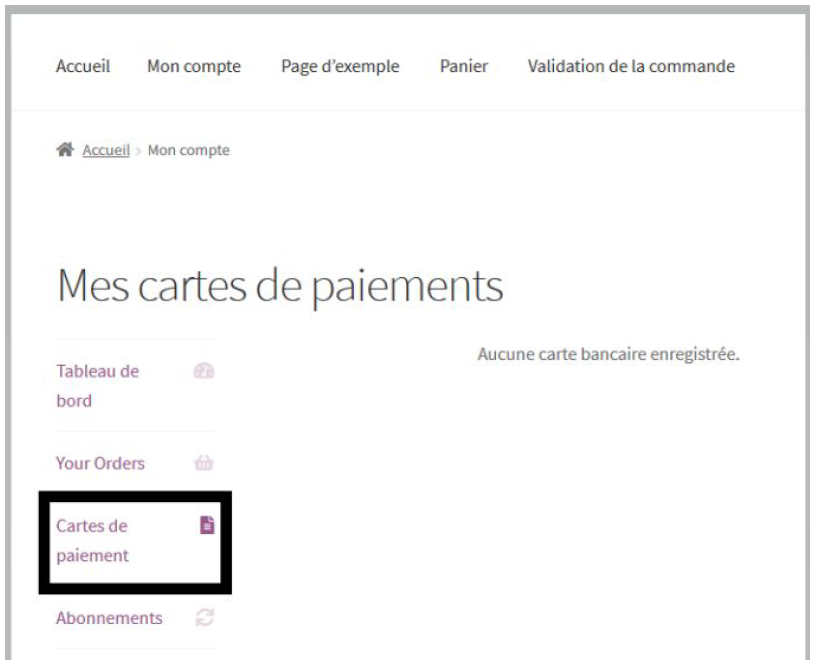
The customer will be able to manage his saved cards in his personal account in the “My saved cards” tab :
Subscriptions
Enable Subscription
You need to make sure that this option is enabled in your configuration ("WooCommerce" > "Axepta Configuration" > "Configuration" of the MID of your shop.
Configuration
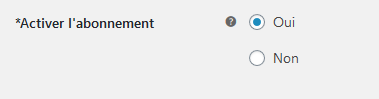
When the subscription functionality is enabled, it's possible to configure items to pay by subscription.
To do so, you should configure every item individually vous devez paramétrer chaque produit dont le mode de paiement par abonnement est accepté. Pour cela, rendez vous dans "Produits" et recherchez par nom le produit que vous souhaitez configurer en abonnement en tapant son nomthat can be paid by subscription, individually. Go to the menu on the left side of your screen > "Products" and search for the product you would like to configure by writing its name or scrolling the list.
On the product sheet (when you click on the name of the product), you can go to the "pay by subscription" tab on the bottom right side of the screen.
...
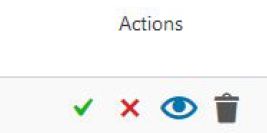
● Check détails about an order
● Delete an ordera subscription
Gérer ses abonnement (vue utilisateur)
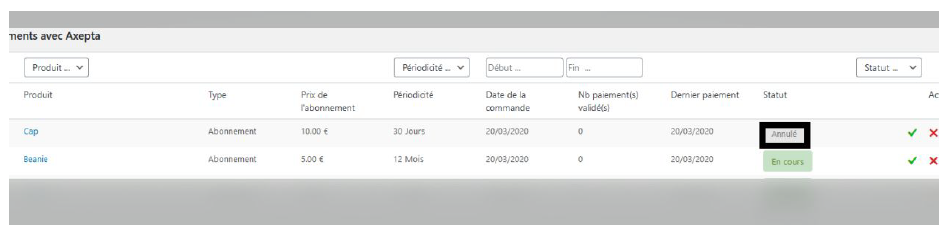
Le client a la possibilité de gérer ses abonnements dans son espace client via l’encart “Mes paiements avec abonnement :
Il peut arrêter/réactiver son abonnement directement en cliquant sur le bouton de la colonne “Action”
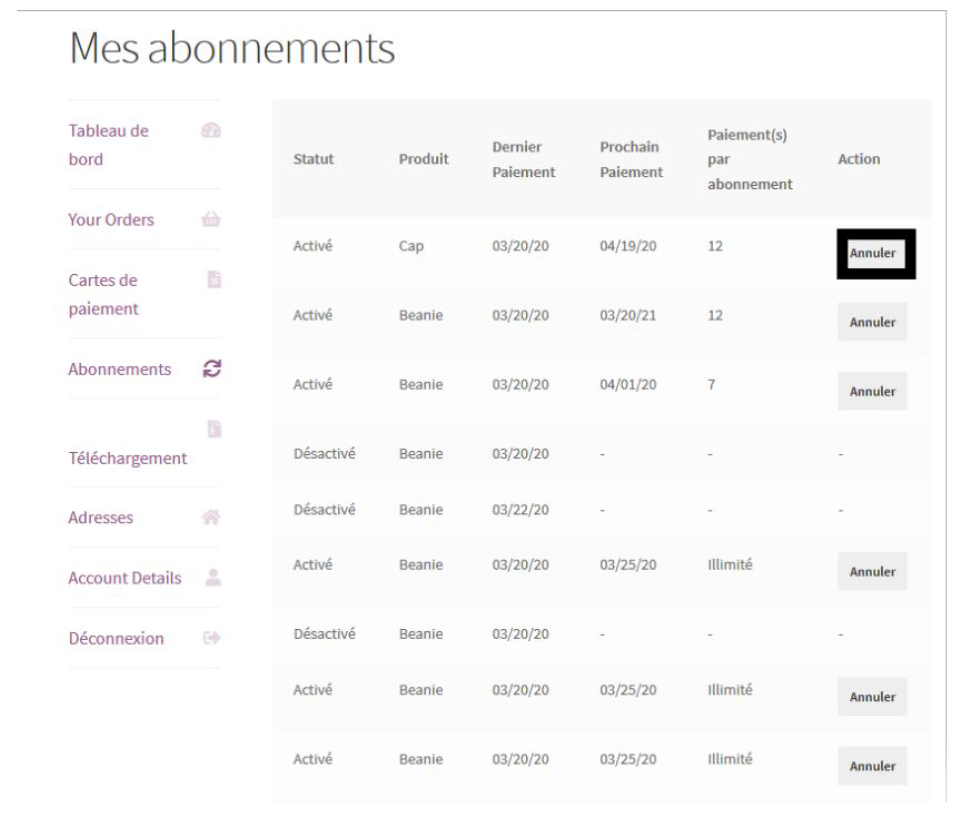
Le statut de l’abonnement se met à jour automatiquement dans le backoffice :
Suivi des commandes
Subscription management (user view / Front office)
The customer can also manage his subscriptions in his personnal account via the tab “My payments with subcription".
He can also enable/disable any subscription instantly by clicking on the button in the "Action" column.
The subscription's status will be updated automatically on the backoffice.
Transactions management
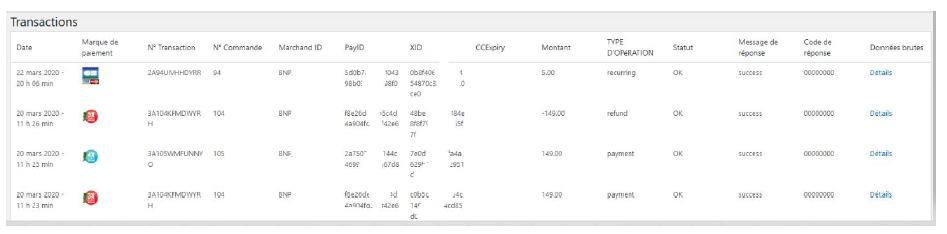
The complete list of transactions paid with different payment methods is available on the transactions tab : Une liste des commandes payées avec l’un des moyens de paiement Axepta est disponible via le menu "Woocommerce" > "Transactions" . Vous aurez alors la liste des commandes avec les informations suivantes :
● Date de la transaction
● Trigramme
● Numéro de transaction
● Référence de la commande
You will get, for every transaction, the following information :
● Transaction's date
● Payment method's brand
● Transaction ID
● Order's reference
● Merchant's Id● Id Marchand
● Pay ID
● XID
● Montant de la transactionAmount
● Type de transaction (paiement, annulation, remboursement, recurring pour l’abonnementTransaction's type (one-off payment, cancellation, refund, recurring payment...)
● Etat Status(succèssuccess, échec, autorisation en coursfailure, authorization... )
● Code réponseResponse code
● un lien Données Brutes pour voir le détail de la transactionDetails
En cliquant sur "Details" on accède à l’écran suivant
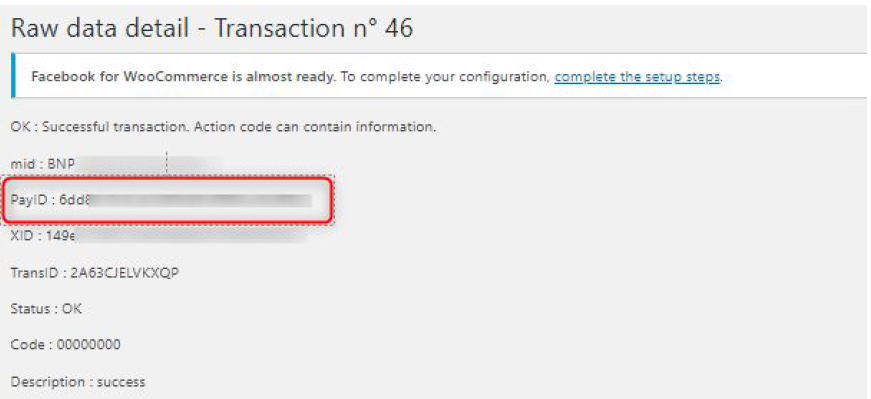
Le PayId vous sera demandé lors de la prise de contact avec le support technique de BNP Paribas en cas de problème avec une transaction.
Les informations sur le détail de la transaction apparaissent également plus bas sur la commande :

Remboursement / annulation
Pour rembourser une transaction, rendez vous dans le backoffice Woocommerce > "Commandes". Vous aurez toute la liste des commandes effectuées sur la boutique. Choisissez une commande qui a été payé via Axepta

Puis cliquez sur "Remboursement".

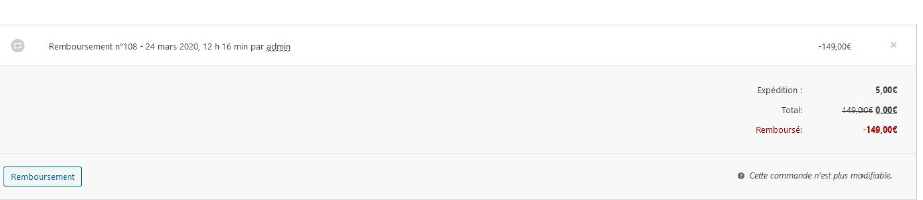
Vous pouvez alors choisir le montant que vous souhaitez rembourser en cliquant sur le bouton “remboursement via Axepta”.
La saisie d’un montant partiel permet d'effectuer un remboursement partiel.
Et enfin, validez le message de confirmation.

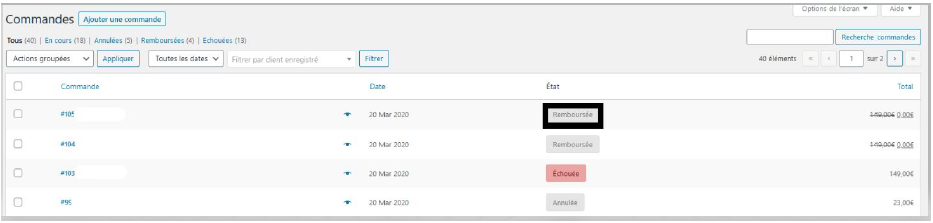
La commande est à présent remboursée du montant que vous avez mentionné.
When you click on "Details" you will have additional information about the transaction (useful to analyze a transaction by the support)
Refund/ cancellation
To make a refund, go to "Woocommerce" > "Orders". You will get the complete list of orders. Once you select one order (by clicking on the name), you will get the following screen :
When you click on "Remboursement", a new tab will appear allowing you to fulfill information about the refund :
- Amount : total amount or partial amount to refund. (The amount indicated can't be higher the total amount)
- Reason : this information is optional.
You can now validate the refund.
The transaction is now refunded.
And the status is automatically updated to La commande est, alors, passée à l'état "remboursée".
Description
...
of payment methods
| Version | Payment methods | Countries | Currencies |
| 1.0 | AMEX |
| All |
| All | |
| 1.0 | CB/VISA/Mastercard |
| All |
| All | |||
| 1.0 | Cetelem 3X | FR | EUR |
| 1.0 | Cetelem 4X | FR | EUR |
| 1.0 | Mastercard/VISA |
| All |
| All | |
| 1.0 | Paypal |
| All |
| All | |||
| 1.0 | Sofort Klarna | DE, AT, BE, IT, ES, NL, CH, PL | EUR |
| 2.0 | Alipay | CN | AUD, CAD, EUR, GBP, HKD, NZD, SGD, USD |
| 2.0 | Bancontact | BE | EUR |
| 2.0 | Boleto Bancário | BR | USD |
| 2.0 | eNets | SG | SGD |
| 2.0 | EPS | AT | EUR |
| 2.0 | Finnish eBanking | FI | EUR |
2.0 | Giropay | DE | EUR |
| 2.0 | iDeal | NL | EUR |
| 2.0 | Multibanco | PL | EUR |
| 2.0 | MyBank | ES,GR, IT | EUR |
| 2.0 | MyClear FPX | MY | MYR |
| 2.0 | Paysafecard | AAT, AU, BE, BG, CA, CH, CY, CZ, DE, DK, ES, FI, FR, GB, GE, GI, HR, HU, IE, IT, LI, LT, LU, MT, MX, NL, NO, NZ, PE, PL, PT, RO, SE, SI, SK, UY | AUD, CAD, CHF, EUR, GBP, NOK, PLN, RON, SEK, USD |
| 2.0 | POLi | AU | AUD |
| 2.0 | POLi | NZ | NZD |
| 2.0 | Przelewy24 | PL | EUR, PLN |
| 2.0 | RHB Bank | MY | MYR |
| 2.0 | SEPA Direct debit | AT, BE, BG, CH, CY, CZ, DE, DK, EE, ES, FI, FR, GB, GR, HR, HU, IE, IS, IT, LI, LT, LU, LV, MC, MT, NL, NO, PL, PT, RO, SE, SI, SK, SM | EUR |
| 2.0 | TrustPay | CZ | CZK |
| 2.0 | TrustPay | SK | EUR |
| 2.0 | UnionPay | CN | USD |
| 2.0 | CN | EUR, GBP, USD | |
| 2.0 | Zimpler | FI | EUR |
| 2.0 | Zimpler | SE | SEK |